~ AROUND THE YEAR WITH COOKIE MOLDS ~
April
Easter and Easter Baskets
My Cookie Molds Books!


Contents
Easter Baskets
Tip: Recognizing the Different Types of Cookie Molds
Recipe: Coconut Sugar Cookies
Tip: Getting the Proportions Right—Honey and Sugar
Recipe: Strawberry Shortcake for Easter Dinner
Tip: Pros and Cons of Honey and Sugar in Molded Cookies
Recipe: Soft Molded Chocolate Sugar Cookies
Tip: How to Get the Best from a Fresh Pineapple
Tip: Another Idea for Cookie Tarts
Tip: Creative Combinations of Cookie Molds and Cutters
Recipe: Cherry and Chocolate Layer Cookies
Recipe: Pecan Cookies with Chocolate Backing
Decorating Your Cookies
April’s Cookie Molds
Easter Baskets
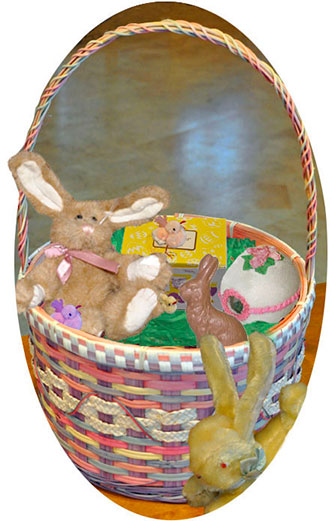
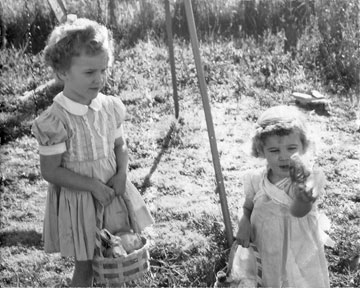
While we slept, the Easter Bunny would leave baskets by our beds. They were colorful baskets, already half full of gifts—wire-footed chenille chicks nested in shiny cellophane grass, tiny chocolate eggs that looked like robin eggs, and colorful boxes with windows that revealed sugar "peep eggs"—which is what we called sugar panorama eggs—and chocolate bunnies or chickens. And the most wonderful thing of all, waiting beside the baskets, were our plush Easter bunnies—or sometimes other animals. I vividly remember a swan with a music box inside.
As soon as we woke, we'd go out, my older sister and I, into the early, early morning, and look for the goodies the Bunny had hidden in the yard. I've always loved dawn—maybe this is one reason why. And why I still like baskets, too.
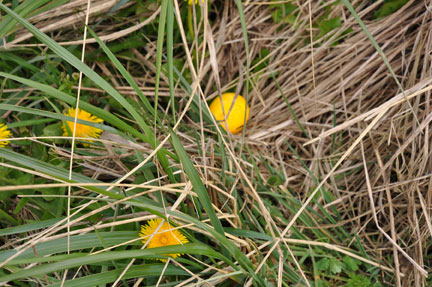
I grew up in New Orleans, so early spring mornings weren't usually cold. But there must have been years when it rained on Easter. Surely the Bunny must have hidden the eggs in the house occasionally. But my rose-colored glasses will only focus on spring sunshine and morning dew, birds chirping, and the bright colors of Easter eggs waiting in the grass and among the flowers.
Finding those eggs was fun for its own sake, because I don't eat hardboiled eggs—never have. So the finding was the only treasure, but it was no less special for that. I also didn't like the hard marshmallow candy eggs and was fairly indifferent to jelly beans, though the bright colors were just right for Easter. But the chocolate-covered eggs and—best of all—the pecan nougat ones were another matter. My favorite fillings in the chocolate eggs were pineapple, coconut, and cherry, so I've worked out some cookie recipes this month with all those flavors, and with pecan and chocolate, too.
My sister and I would keep the milk chocolate animals for weeks, until they were no longer special, and then nibble at them till they were gone. And finally, regretfully, the panorama eggs, which wouldn't last through a humid New Orleans summer and actually didn't taste good, as they were nothing but sugar. We could have thrown them away, but somehow, that seemed too cavalier, too unappreciative of the Bunny and his gifts. The toy bunnies were treasured "forever," or at least a couple of years. That's as good as forever, when you're two and four years old.
Years later, I got to be the Bunny's helper for my much-younger brother, and I enjoyed that even more. Dyeing eggs in the kitchen after his bedtime, trying all the pretty colors and variations I could get by dipping the eggs twice. Getting up before dawn with instructions about how well I could hide them—the point, as the Bunny explained, was not to outsmart my brother but to amuse him. So I'd make sure the concealment was age-appropriate, and help him a little if I'd been just a little too clever. The Bunny was pretty definite about not wanting a yard full of rotten eggs, an understandable position.
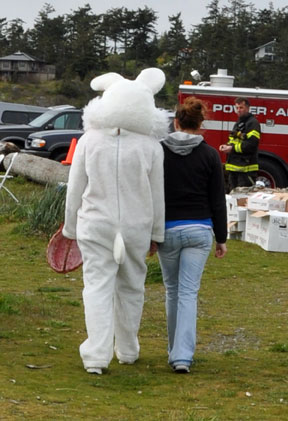
Here on San Juan Island, the Fire Department plays Bunny for the children, hiding the eggs—plastic ones—in the sea grass and driftwood of the shore. The eggs are redeemed for candy and toys at a prize table.
It's a long way in time, distance, and feeling from New Orleans dawns with my sister. But kids are still celebrating, and adults are still having fun helping them do it. Some things really do last forever.
Those of you who have read my book, Baking with Cookie Molds, know that I use honey or other liquid sweeteners in my recipes to make them easier to unmold. This month, we're going to explore the use of sugar in cookies, and adjusting sugar and liquid sweetener proportions to suit our mold. And we're going to do a little decorating, too. And finally—one month for shortbread just wasn't enough—we'll have strawberry shortbread for Easter dinner.


Tip: Recognizing the Different Types of Cookie Molds
This is important if you want to modify recipes, as we'll be doing this month.
Cookie molds come to us from several different traditions. Springerle cookies are made in a tradition that used sugar as the sweetener. The mold is a flat surface—the old ones are boards, or boards covered with metal. Sometimes this surface might be curved into a rolling pin. This surface of a springerle mold has a design carved into it, but not a whole cookie. You have to cut the cookie out. Or, if the mold makes more than one design, you cut the cookies apart. A springerle mold works in about the same way a rubber stamp does.
The other main tradition is gingerbread or speculaas. These molds were originally to make honey-sweetened cookies. The mold shapes the entire cookie. When you're finished molding the cookie, you have to pull it out of the mold. It has its own edges, just like something you unmold from a gelatin mold. You trim it, but the shape and edges are set by the mold. A gingerbread mold is like a very, very shallow gelatin or pudding mold. Today, these molds are called cavity molds.
Which type of mold you have makes a big difference in how easy it is to make cookies. Sugar is harder to handle than honey, because sugar dough is a collection of crumbs. It falls apart easily, and is very difficult to unmold from some cavity molds. So springerle molds are easier to use than cavity molds.
My book Baking with Cookie Molds concentrated on making molded cookies available to everyone, no matter what kind of molds they might have. This month, we're going a step farther. We're going to get a little more advanced and see what we can get away with. Because there's no doubt that many people today do prefer the taste and texture of sugar sweetened cookies to that of honey sweetened ones. So we're going to use springerle molds to make sugar-sweetened butter cookies. And we'll look at how much honey you need for cookies in different cavity molds.
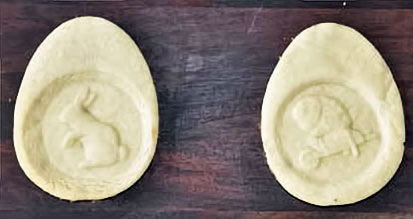
So sort your molds, and separate the springerle molds from the cavity molds. Here's an illustration of each type.
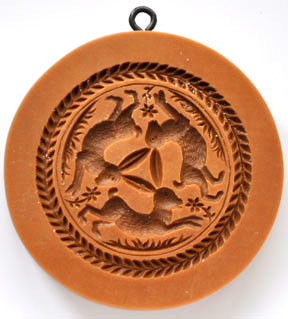
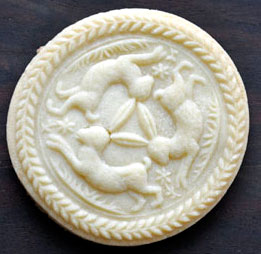
Running Rabbits by Springerle Joy
This is a springerle mold. It's a flat surface with a pattern cut into it. You press it onto the dough and then cut out the cookie.

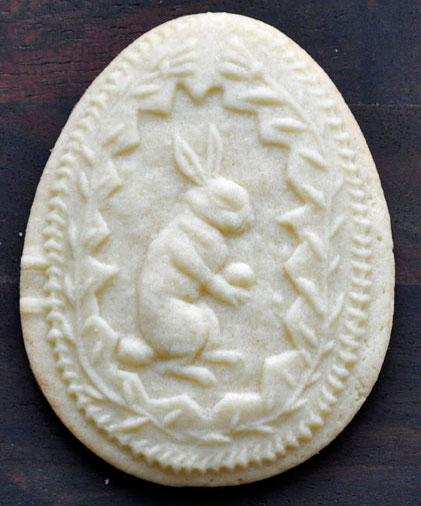
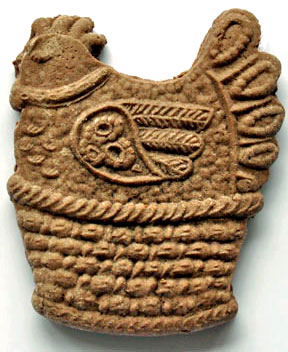
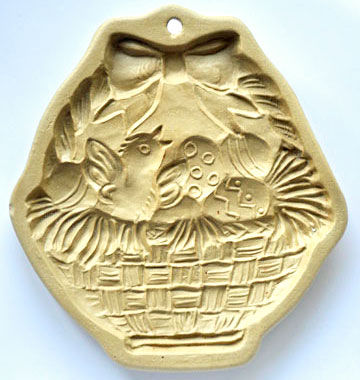
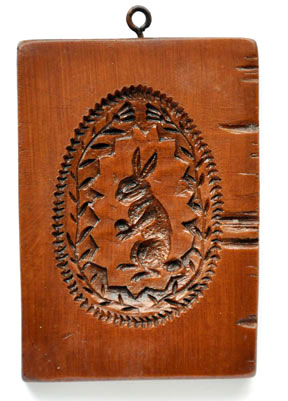
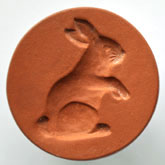
Easter Bunny by HOBI Cookie Molds
This is a cavity mold. The entire cookie shape is cut into the board. You press the dough into it and then unmold and trim the cookie.
Other tips in this issue will tell you how to use these mold types to best advantage with honey and sugar sweetening in your cookies.
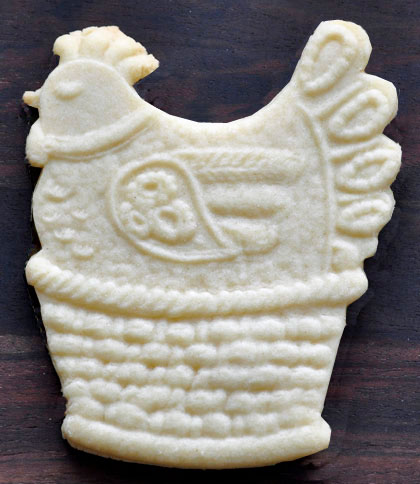
Recipe: Coconut Sugar Cookies
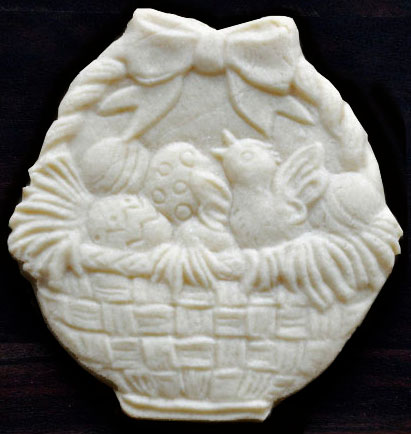
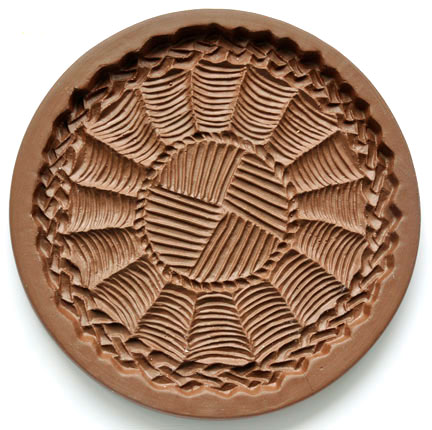
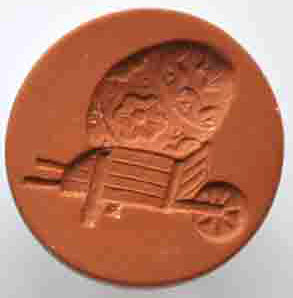
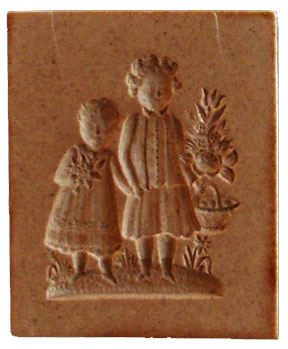
This is a cavity mold, and I made the cookies successfully without the added honey. This mold isn't a complicated design, and it isn't a difficult shape.
What would be a complicated design? One with a great deal of fine texture. This design does have texture, but it's fairly coarse. The finished cookie is about four inches tall, so it's reduced here.
What would be a difficult shape? The most difficult shape is one with inward-pointing angles—a star is a good example. If you look at the overall shape of this cookie, it's nearly round, the easies shape to handle.
However, if you're new at making molded cookies, I suggest you use it to begin with. Then, if you find that everything goes easily for you, you could omit the honey the next time.
1 cup (225 grams) unsalted butter
1 large egg
1 cup (200 grams) sugar
1 tablespoon milk or cream
1 tablespoon honey, optional
2 teaspoons coconut extract
1/2 teaspoon vanilla extract
1/8 teaspoon salt
About 4 cups (560 grams) all-purpose flour (plain flour)
1. Melt the butter and set aside.
2. Beat the egg in a large bowl until the yolk and white are fully mixed.
3. Mix the sugar and salt and add to the egg. Beat until well mixed.
4. Mix the milk, honey, coconut extract, and vanilla extract, and add to the egg mixture.
5. Add the melted butter slowly and beat until well mixed. Don’t just pour it in quickly—the heat still in the butter could cook the egg!
6. Add flour slowly and mix in until you have dough that is solid enough to knead.
7. Transfer the dough to a floured work surface. Continue adding flour by kneading in a little at a time until the dough is smooth and slightly sticky.
8. Roll and form the dough according to the directions for your cookie mold.
9. Bake for 10 to 15 minutes or until the edges have slightly browned and the top has begun to firm up.

Honesty compels me to admit that I "decorated" this cookie in my photo program. As it turned out, it was the only way I could do it. By the time it occurred to me how cute it would look in color, the real cookie had been eaten! However, you could easily do something like this with cookie paints—if your family doesn't beat you to the cookies.
Tip: Getting the Proportions Right—Honey and Sugar
Now that you know which mold is which—how should you use the information?
If you're happy with cookies sweetened with 50% honey, like most of the recipes in my book, the only thing you need to know is that making cookies in enormous molds will be much easier to use if you use 100% honey instead. By "enormous," I mean something at least eight inches in diameter. I've make cookies almost two feet square, and gotten them perfect on the first try, with 100% honey dough. To modern tastes, an all-honey cookie is a little strange to eat, I must admit. It's denser than cookies today, and not all that sweet. However, enormous cookies aren't really expected to be gourmet quality.
The recipes in my book will work well with all other molds.
If you want sweeter, tenderer cookies than you get with the 50% honey recipes in my book, you might be pleased with the results of maximizing the sugar. Learning what you can get away with is going to take some trial and error.
The larger the mold, the more honey you'll need. If a mold is much larger in one direction than another, like a long rectangle, you may need more honey, too.
Springerle molds are likely to be successful with 100% sugar-sweetened doughs, especially if they're small. Cavity molds are more likely to give you trouble.
With the right mold, you can get all the way to 100% sugar sweetening. If I do that, I prepare the molds a little differently. I use no oil, but dust both the mold and the dough lightly with flour, using a pastry brush to make a thin, even coat.
Recipe: Strawberry Shortcake for Easter Dinner
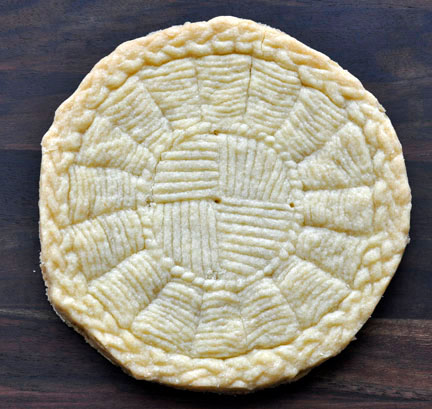
To the Scottish part of my family, the idea of making strawberry shortcake with sponge cake or pound cake is anathema. Shortcake is made with shortbread, they say. I must admit, it's very good.
The secret to making shortbread in a large mold is that you don't use the soft flour you can get away with using for tiny cookies—the kind I talked about in last month's issue. No, you're going to have to use regular all-purpose flour for a large shortbread cookie. And—speaking of honey and sugar—adding just one tablespoon of honey to the traditional shortbread recipe will make it a lot easier to handle.
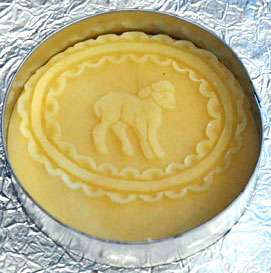
Another thing you need to know is that these shortbread "pans" don't bake shortbread all that well. Use the pan as if it were a large springerle mold, to shape your shortbread. Then bake it on a cookie sheet. I made a ring, rather like a flan ring, from nonstick aluminum foil and fastened it with a safety pin—this kept the cookie from spreading.
Of course, being confined in a ring made it want to puff. So I took it out of the oven several times while it was baking. This took the puff out, and let the cookie firm up a little. Then I put it back in the oven.
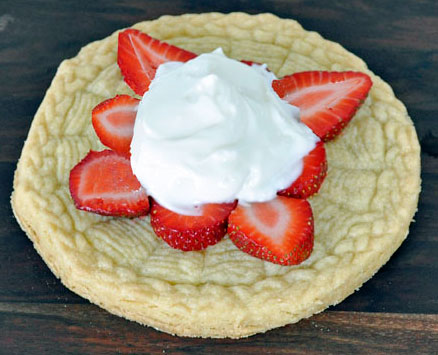
We like yogurt with our shortcake, but of course you could put whipped cream on it instead. If you're skilled with a decorating bag—which I'm not—you could probably do something very impressive.
Tip: Pros and Cons of Honey and Sugar in Molded Cookies
Many people today prefer the taste of sugar-sweetened cookies. Not everyone, though. Some of the testers who worked with me on the book still mention that their favorite thing about my cookies was that they weren't as sweet as modern cookies. But if you do like for sweets to be very sweet, that's the main advantage of using all sugar.
The disadvantage, in addition to possible problems unmolding the cookies, is that the dough dries out faster in handling and rerolled dough is more likely to crack in the oven. It's just less flexible than dough that contains a fair amount of honey.
Try both, and see what you think. Then adjust my recipes—or anyone's—to suit your own taste.
Recipe: Soft Molded Chocolate Sugar Cookies
These have their advantages and disadvantages. First of all, the main advantage—they're soft and cake-like, but keep the molded pattern. Now the downside: they are harder to unmold, and the chocolate flavor and color is less intense than that of my other main chocolate cookie recipe. Just the same, the texture of molded cookies is something not everyone likes. If you're interested in doing it this way, I suggest reading about the creaming method in Alton Brown's book, I'm Just Here for More Food. He describes the best way to do it in very clear, detailed instructions. This is a modification of his recommendations, but I learned a lot by reading his book, and recommend it highly.
1 cup (225 grams) unsalted butter, at room temperature
1 cup (200 grams) sugar
1 large egg at room temperature
1 tablespoon milk or cream
1 teaspoon vanilla extract
2 teaspoons chocolate extract
3-3/4 cups (525 grams) all-purpose flour (plain flour)
2 tablespoons baking cocoa
1/8 teaspoon salt
1. Beat the butter briefly with the flat paddle of a stand mixer, using the lowest speed.
2. Increase the speed a little and trickle the sugar in gradually. Beat until light in color and texture.
3. Beat the egg and add to the butter and sugar.
4. Mix the milk, chocolate extract, and vanilla extract.
5. Mix the flour, salt, and cocoa
6. Add thirds of the flour mixture slowly, alternating with halves of the milk mixture.
7. Transfer the dough to a floured work surface. You may need to work in a little more flour to make dough that is smooth and slightly sticky.
8. Roll and form the dough. With this dough, I recommend lightly flouring both the dough and the mold rather than using oil. Use a foil backing sheet per the directions in my book Baking with Cookie Molds.
9. Chill this dough before trimming the cookies. It won't trim neatly unless you do.
10. Bake for 10 to 15 minutes or until the edges have slightly browned and the top has begun to firm up.
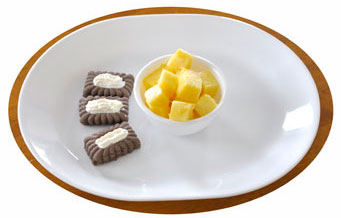
As you can see, the cookies are much lighter than chocolate candy animals. A denser chocolate dough, like for the cookie tarts below from the December issue of this magazine, gives a darker color. But these don't have the cake-like texture. Depending on which you prefer, you could use December's recipe for your chocolate Easter animals.
Variation—Soft Chocolate Cookie Tarts
I also made the soft chocolate sugar cookies with a tart mold, and filled it with buttercream with the flavors of my long-ago favorite candy eggs. Use a good recipe for buttercream filling or buy prepared buttercream frosting. Flavor with Easter flavors such as pineapple or cherry flavoring or coconut extract. Fill the cookie tarts at the last minute to make sure they don't get soggy from the filling. Serve with fresh fruit.
Tip: How to Get the Best from a Fresh Pineapple
My love for pineapple didn't stop with pineapple Easter eggs. I still love it every way, especially fresh. This is a tip I learned from a friend who spent her childhood in Hawaii. You'll think it sounds crazy until you try it. Then you'll try to persuade your friends that it's not crazy. And until they try it...
When you buy a pineapple, bring it home and turn it upside down. Find a way to keep it upside down for at least several hours (I use the my blender—take the top off and put the pineapple in the jar. It's heavy enough to keep it in place. Or you can wedge it into a corner on the counter.) Overnight is good. Then remove the leafy top, peel, slice, and serve.
It works because the fruit sugar in the pineapple runs to the bottom when it's sitting upright in the store. You know how the bottom third of a fresh pineapple is always sweeter than the part near the leaves? If you give it some upside-down time, the whole pineapple will be sweet.
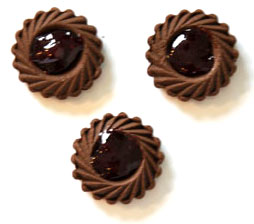
Tip: Another Idea for Cookie Tarts
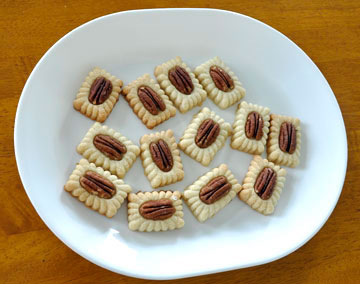
Here's a plain shortbread—but going back to last month's shortbread issue, you could make any shortbread you want—made into a tart form with a pecan half used for a filling. You could make a chocolate shortbread dough, or butterscotch, or maple—any flavor you fancy. It doesn't have to be pecans—most unsalted nuts would be good. You make the tarts, press the nut into the center, and bake them together. The nut toasts nicely while the cookie bakes.
If you use hazelnuts, remove the skins first. Keep an eye on the nuts to make sure they don't burn. If you are using almonds, try to get them already blanched.
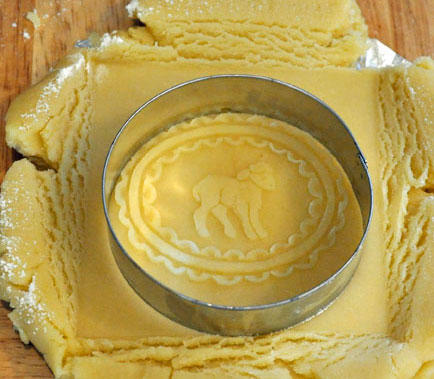
Tip: Creative Combinations of Cookie Molds and Cutters
Faking a Shape
Here I'm cutting out an oval molded cookie with a round cookie cutter. You can cut a rectangle with a square cookie cutter in pretty much the same way. You just use part of the cutter at a time.
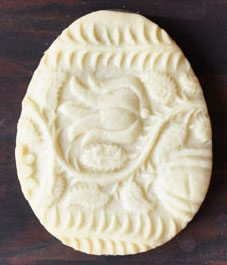
Russian Easter Egg Cookies
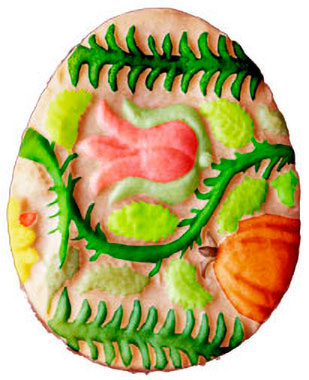
Some springerle molds create a pattern rather than an image. Here are cookies made with one of the allover pattern rolling pins featured in the January issue of this magazine, cut out with an egg-shaped cutter. You could paint these to resemble traditional Russian Easter eggs.
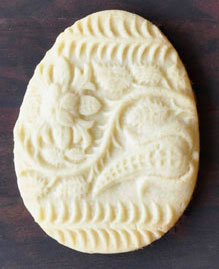
Here's my attempt at the coloring of a Russian Easter egg. Not quite Faberge yet, but pretty, just the same.
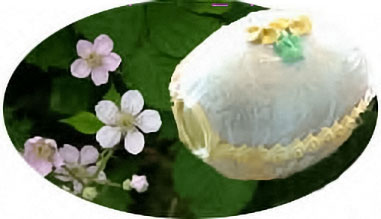
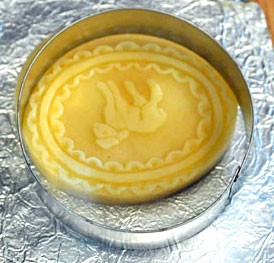
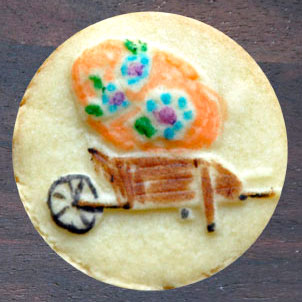
Panorama Egg Cookies
And here's one more bit of fun—a combination of a cookie stamp and an egg-shaped cutter. I made cookie "panorama egg" with this combination. The stamp makes the pattern and the round "hole," and you use the cutter to make the shape. Stamp first, then cut, or the cookie will distort.
With a little color and frosting, you could do something like this:
Recipe: Cherry and Chocolate Layer Cookies
Make the recipe I gave earlier for Coconut Sugar Cookies, substituting cherry flavoring for the coconut extract. Then divide the dough in two. One piece should be about twice the size of the other.
Into the smaller ball of dough, knead
2 tablespoons mini chocolate chips
2 tablespoons very finely chopped dried cherries
The cherries are going to expand quite a bit as they absorb liquid from the dough, so make sure the pieces are extra small. The cookies will be hard to cut out if you have pieces of dried fruit that are too large.
Now follow the instructions for layered cookies in the November issue of this magazine.
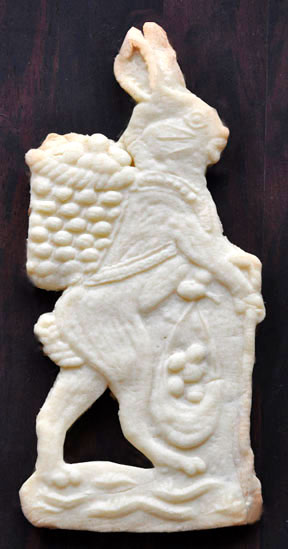
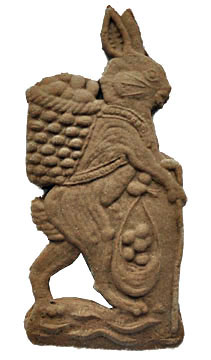
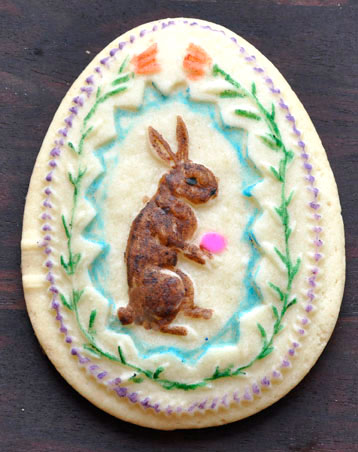
This cookie mold takes more skill than the one I used for the coconut sugar cookies. It's long and thin and has several inward-pointing angles—at the places where the basket meets the rabbit's back, at the back of the ears, and at the V shape made by his hind legs. Notice how the carver has avoided sharp inward-pointing angles as much as possible, though—at the front of the ears, the neck, and the place where the rear leg meets the tail. This will minimize the likelihood that the cookie will tear as you unmold it. It's still a mold that takes a bit of skill and patience.
Intermediate or advanced cookie molders should be able to unmold this one without honey in the dough, possibly with a few failures. On the other hand, this recipe is a layered cookie, where no re-rolling is possible, so unless you're very skilled, I recommend using a tablespoon of honey.
This cookie would be quite pretty painted, though it's just as nice plain. Either way, it's a classic Easter bunny!
Recipe: Pecan Cookies with Chocolate Backing
The nuts make the dough a little more difficult to handle, so I've used a larger amount of honey here. Whether you need it would depend partly on the mold you're using.
1 cup (225 grams) butter
1 large egg
1/4 cup (60 milliliters) honey
3/4 cup (175 grams) sugar
1/2 cup (80 grams) finely ground pecans
1/4 teaspoon salt
About 4-1/4 cups (560 grams) all-purpose flour
1. Melt the butter. Set aside.
2. Beat the egg in a large bowl.
3. Add the honey to the egg mixture.
4. Mix the sugar, ground nuts, and salt. Add to the egg mixture.
5. Add the butter slowly and beat well.
6. Add flour slowly until the mixture is solid enough to knead. If you’re using an electric mixer, stop the mixer once or twice as you’re adding flour, and scrape the sides of the bowl to get all the flour mixed in.
7. Transfer to a counter and knead in a little more flour if required to make a soft, slightly sticky dough.
8. Wrap and refrigerate the dough for 30 minutes.
9. Roll and form the dough according to the directions your cookie mold, or use the basic directions in the appendix of this book
10. Chill the cookies while you preheat the oven to 350°F (177°C).
11. Bake for 10-15 minutes or until slightly browned at the edges.
For a chocolate backing, see the recipe for Peppermint Chocolate Cookies in my book, Baking with Cookie Molds—but omit the mint flavoring.
You may be able to buy ground nuts, or you can grind them in a food processor or blender with a cup or two of the flour (which keeps the nuts from turning into nut butter).
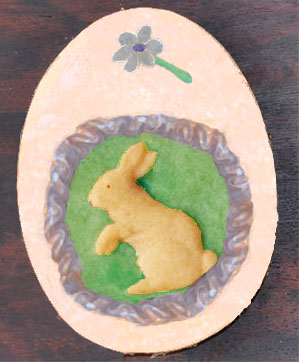
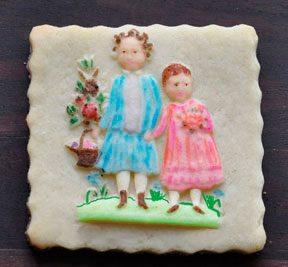
Decorating Your Cookies
I'm sure experienced decorators can do much more impressive things with molded cookies than I can! But here are some of the Easter cookies, as you could decorate them with cookie paint and decorating pens. I'm going to do more with cookie painting in the next few months, so come back to see what I've learned.
April’s Cookie Molds
Running Rabbits by Springerle Joy
Easter Bunny by HOBI Cookie Molds
Easter Basket by Brown Bag Cookie Molds
Ric-Rac Rabbit by House on the Hill
Basket by Hartstone
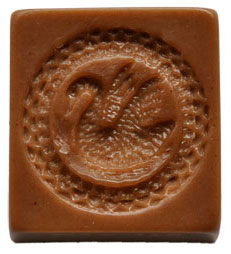
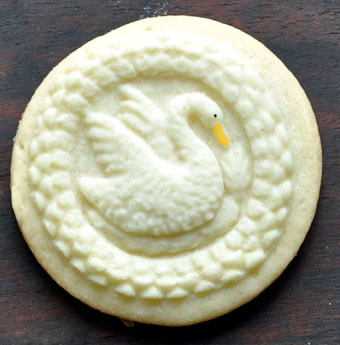
Swan mold by The Springerle Baker
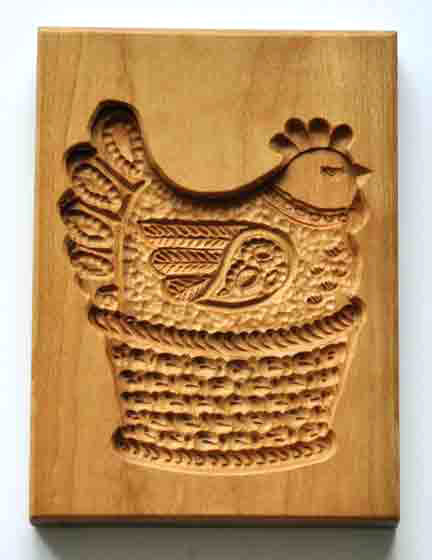
Hen on Nest by HOBI Cookie Molds
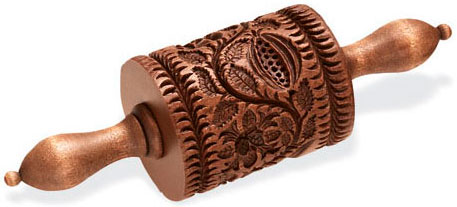
Twining Vine rolling pin by House on the Hill
Bunny cookie stamp by Rycraft
Easter Egg cookie stamp by Rycraft
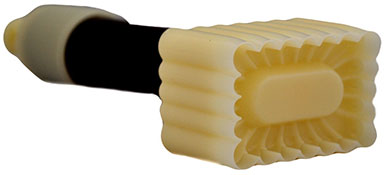
Rectangular Cookie Press by Brown Cookie
Easter cookie mold by The Springerle Baker
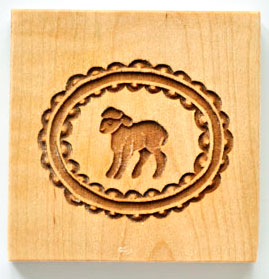
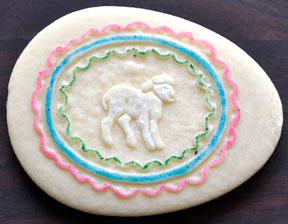
Lamb by My Cookie Mold