~ AROUND THE YEAR WITH COOKIE MOLDS ~
March
Spring, Saint Patrick’s Day, and Shortbread
My Cookie Molds Books!


Contents
Spring
Shortbread
How to Create Your Own Shortbread Recipe
Tip: Shortbread Molds, Forms, and Pans
Recipe: Tropical Shortbread
Recipe: Chocolate-Almond Shortbread
Recipe: Butterscotch Shortbread
Tip: The Perfect Traditional Shortbread
Tip: Making Shortbread Cookie Tarts
March’s Cookie Molds
Spring
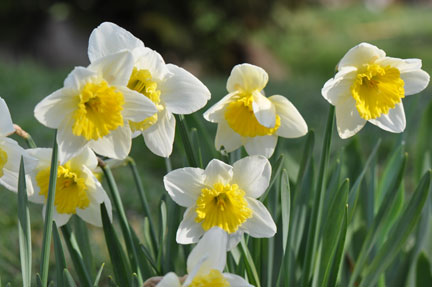
March on San Juan Island can bring just about anything—sunshine and flowers, rain, or fierce windstorms that scatter the cherry blossoms like snow. One day, the sea will be blue and sparkling; the next, it's gray and sullen. Spring is here, except when it's not.
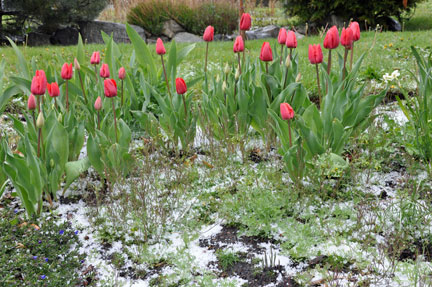
The threat of serious winter storms is over, but we can still find snow dusting the blooming tulips. Sometimes, the rhododendron flowers last only a day or two before the wind shreds them. It's hard to know what to expect. We keep an eye on the forecast, noting how fast it changes. We dress in layers and hope for the best.
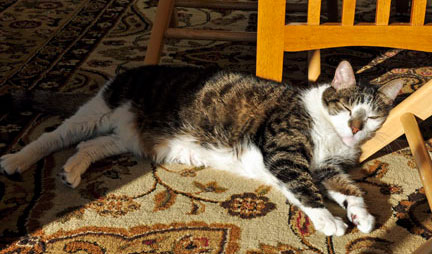
On bright days, my cat Skeeter follows the sun around the floor, sleeping in one warm patch after another. I wonder about cats and sleep—do they have amazing dreams? Otherwise, life just passes by them—the next dish of food, the next back scratch, the next mischief to get into...
I thought Skeeter would outgrow this mischief thing, but he hasn't. He's twelve years old, and houseplants are still not safe from him. I protect them with stuffed animals, which—in his case—work as scarecrows. He can't grasp the idea that the plants belong to me, but can easily believe they're the property of a teddy bear.
Spring also brings a return of the local birds. And here again, the cat makes his presence known. He's an indoor cat, so he never has a chance at them, but oh, if we would only unleash him, what he would do to those bald eagles! In his dreams, which he goes back to in short order.
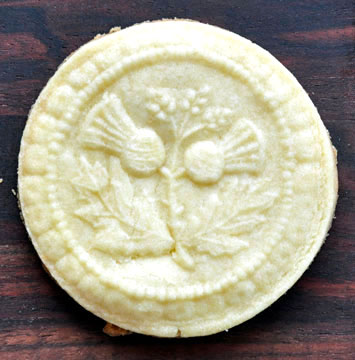
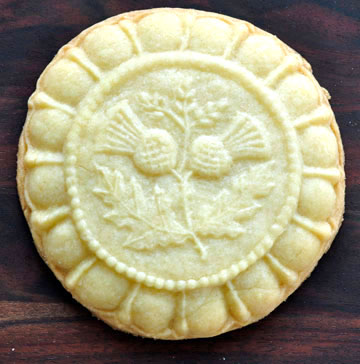
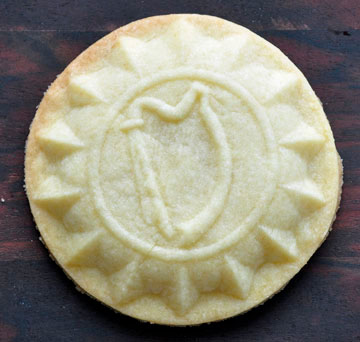
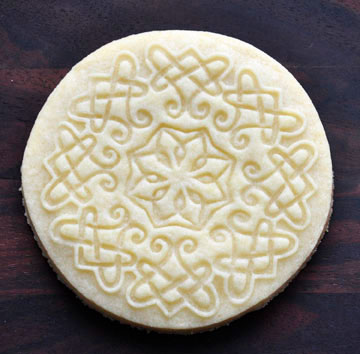
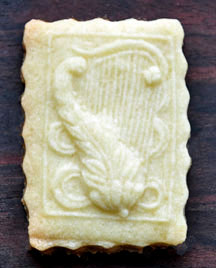
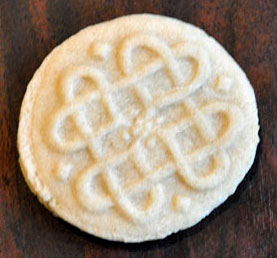
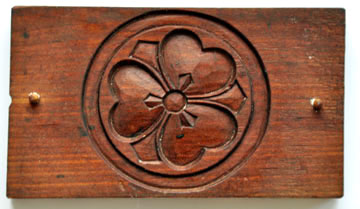
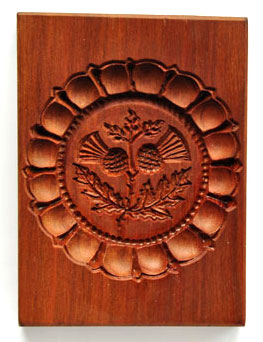
This month's cookie molds will feature traditional symbols of the British Isles, the homeland of shortbread. And of St. Patrick, whose day is celebrated this month. Patrick is credited, among other things, with driving the snakes out of Ireland, though science maintains there were never any there to begin with. More certain is the attribution to Patrick of a version of a prayer called "St. Patrick's Breastplate" or "The Deer's Cry," a beautiful poem often beautifully sung. Patrick is also associated with the shamrock, which he supposedly used as a teaching tool. The thistle of Scotland, rose of England, Celtic knot, and Irish harp complete the themes of this month's cookie molds.
May the road rise up to meet you.May the wind always be at your back.May the sun shine warm upon your face,and rains fall soft upon your fields.—From an Irish blessing
Shortbread

When it comes to shortbread, feelings can run high.
People who love shortbread know exactly what they want. The problem is, they don't all want the same thing. Desirable shortbread qualities include, depending on who you ask, flaky, buttery, soft, delicate, caramelized, and crisp. It's possible to make shortbread with several of these qualities, but not all. Your choice of mold and ingredients will be the key to getting the shortbread you want.
Traditional ingredients are butter, flour, and sugar, that's all. The flour content may include oat or rice flour as well as wheat. However, there are many variations and additions, some for taste, others for workability. These include vanilla or other flavorings, ground nuts, spelt flour, confectioner's sugar, cocoa powder in place of some of the flour, eggs or egg yolks, water, cream, baking powder, and others.
Shortbread as we know it today goes back at least to Elizabethan times. It was probably first made in Scotland. Traditionally, it was hand-formed as a round flat cake with a crimped edge. Probably later, shortbread was also made as fingers, which were narrow squares, and as small rounds. It was often pricked with a fork over the top surface. All these shapes were baked on a flat pan.
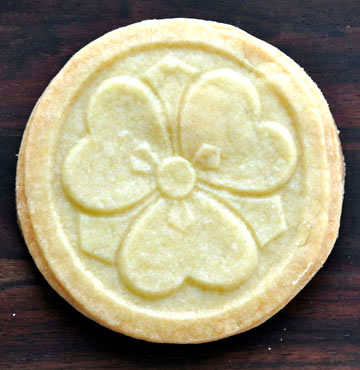
Since shortbread wasn't traditionally a molded cookie, it's not the easiest cookie to mold. It is very tender, and is likely to break when you unmold it. It also, more than most cookie dough, tends to puff and distort in the oven. And it tends to hold details through baking less well than most cookie dough. I've tried many types of molds, and quite a few are pictured and discussed in the articles this month. The one pictured above, House on the Hill's "Symbols of the British Isles," is my favorite, and the one I use most often for my own molded shortbread. It's very deep, which easily overcomes shortbread's tendency to lose detail, but it has little tendency to hang onto the dough as it's being unmolded. Truly a standout.
Commercial shortbread cookies have been manufactured since the 19th Century. They're formed with mechanical rollers, and are thinner and crisper than the shortbread usually made by home cooks. It's possible for these rollers to impress a pattern on the cookies, and some firms do this, though others duplicate the simpler traditional shapes, including the fork punctures. They're baked on flat pans or sheets, like traditional homemade shortbread. The closest thing to this rolled shortbread that a home cook can use is a springerle rolling pin. I've never seen them suggested for shortbread, but actually, they do an excellent job with it. And since they minimize handling, you get less fuss and breakage than with most traditional shortbread molds.
I'm not a fan of the pottery pans for baking shortbread with a molded pattern on the bottom, but I have figured out one way to get them to work fairly well, and have described it below.
How to Create Your Own Shortbread Recipe
I could create a few shortbread recipes, or a book full of them. Instead, I want to look at shortbread as a method and give you the tools for creating your own.
Here are the ingredients I use in shortbread:
Sugar. Any kind—white, brown, maple, whatever. It should be finely granulated. Artificial sweeteners aren't going to work here. My recipe calls for 1/2 cup, which is 100 grams for white sugar. If you're using another kind, you'll need to find the equivalent weight to 1/2 cup.
Syrup. This isn't traditional, but it makes a big difference in how easily your cookies unmold. Since shortbread is probably the least cooperative of all molded cookies, I shrug at tradition and use 1 tablespoon of syrup. This can be honey, molasses, sieved jam or jelly, agave syrup, corn syrup, maple syrup, or probably a host of others. I haven't tried everything, but pancake syrup, syrups intended for coffee flavoring, chocolate syrup, coconut cream, or a dozen others would probably work. The purpose of the syrup is to help the cookies hang together well enough to unmold.
Flour. About 2-1/2 cups of flour. Up to a half cup of this may be a flour substitute, such a rice flour, or cocoa. If the cookie molds are small and simple, up to 50% of the flour can be cake flour.
You can use about 2 ounces, or 60 grams, of nuts as part of the flour amount. If you use nuts, you'll probably have to grind them yourself. The way I do this is to toast them lightly, remove the skins if necessary, and process them in a food processor with one cup of the flour. The flour prevents the nuts from turning into nut butter.
Regarding the skins of nuts. Some nuts don't have them. For others, such as pecans, it doesn't matter. Almonds should be blanched. You can usually buy them that way, but you can also blanch them yourself, with instructions you can find online. You can also remove hazelnut skins.
Flavorings. Traditionally, none are used. So, if you decide to be non-traditional, the sky is the limit. Consider flavoring extracts, culinary flavoring oils, ground lavender buds, grated fresh ginger, ground spices, or anything else that appeals to you. I often use the book, The Flavor Bible, by Karen Page and Andrew Dornenburg. I've always been pleased with their recommendations—it's a great resource.
Baking. I like a temperature of 320°F (160°C) for shortbread—a little lower than I'd use for most cookies. Keep an eye on the cookies, as they burn easily. They're done when the bottoms are browned. Remove them from the oven if you're not sure whether they're done—it won't hurt anything if you have to put them back for a few minutes.
Fillings. If you use a cookie tart mold, you can fill the shortbread cookies with dabs of lemon curd, frosting, whipped cream, whipped cream cheese, jam, nut butters, or combinations of these.
Accompaniments. Fresh fruit is good with shortbread. So is ice cream, or whipped cream. Marry the flavors so that it all works together.
Tip: Shortbread Molds, Forms, and Pans
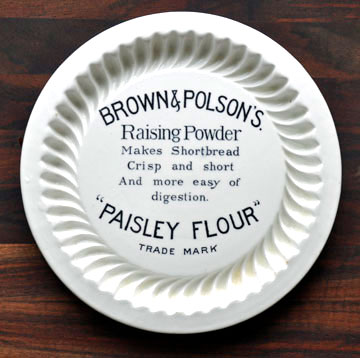
Shortbread molds are relatively recent. The earliest shortbread mold I've seen, one from the early 20th Century, reproduces the large, crimped round, though it's hard to guess why anyone would bother to use a mold to make this shape.
In the late 20th Century, several firms began making ceramic or metal pans. The bottoms of these pans usually have fancy patterns, Scottish thistles, flowers, hearts, or even animals. The shortbread is baked in the pans, removed and sliced into individual servings while it's still warm.
You can get fair results with these pans if you fill the pan about half full, lay a sheet of nonstick foil over the top, and lay a chain-type pie weight on top of that. However, I don't know anyone who is completely satisfied with these molds. The image is formed on the bottom of the pan, which produces a coarser, less distinct result than you get with other molds.
Another problem is that steam from the baking dough tends to make the cookie heave and bubble.
Every tester who has worked with me has had the same experience with bake-in pans and molds, and I'm ready to say it: These cookie molds just don't seem to have much potential to produce beautiful cookies. If someone out there has had a different experience, has found a technique that really works with these things, please let me know, and I'll blog it with a credit to you. For now, though, I think my mom has the best solution—she uses her shortbread pan as a serving dish for cookies she's made with other molds.
Most people are happier if they use pottery or wood cookie stamps or roller or board type springerle molds. This is completely non-traditional as a home method, although it more or less duplicates the way commercial shortbread cookies have always been made. Rollers produce a crisper cookie, and the outer surface may taste somewhat caramelized, which is delicious.
Recipe: Tropical Shortbread

1 cup (225 grams) butter
1/2 cup (100 grams) sugar
1 tablespoon honey
1 teaspoon grated fresh ginger
1/4 teaspoon culinary tangerine or orange oil
1/2 teaspoon grated lemon peel
1/2 cup (80 grams) finely ground roasted unsalted cashews
2 cups (280 grams) all purpose flour
1. Cream the butter, sugar, and honey.
2. Combine the ginger, tangerine oil, and lemon peel, and add to the butter mixture.
3. Add flour and ground nuts slowly until the mixture is solid enough to knead.
4. Transfer to your work surface and knead in all but the last 1/4 cup (35 grams) of all-purpose flour.
5. Add up to 1/4 cup (35 grams) more all-purpose flour slowly and carefully, checking the texture of your dough as you go. Stop adding when the dough is still tacky but no longer sticks to your work surface.
6. When the flour amount seems right, wrap and set aside. Do not chill before molding.
7. I recommend molding and baking a test cookie to make sure your dough is correct. If you haven't added enough flour, the cookies won't hold an impression.
8. Preheat the oven to 320°F (160°C).
9. Bake the test cookie for 10 to 15 minutes or until the edges have slightly browned and the top has begun to firm up.
10. Examine the test cookie. If it has spread during baking and the design has become blurry, knead a little more flour into the rest of the dough and repeat the test.
11. When you have good results from the test, form and bake the rest of the cookies.
To grind cashews, combine the nuts with about one cup of the flour and grind in a food processor with the steel blade until the nuts are finely ground.
To get more of the subtle cashew flavor, use less of the ginger, tangerine, and lemon, or eliminate them completely. Either way, delicious and different!
Recipe: Chocolate Almond Shortbread
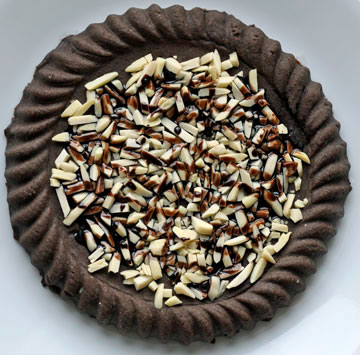
I made this cookie with a mold that creates a tart shape. You can use smaller tart molds as well. It's filled with chopped almonds and garnished with lines of chocolate syrup.
1 cup (225 grams) butter
1/2 cup (100 grams) sugar
1 tablespoon dark chocolate syrup
1 teaspoon vanilla
1/2 teaspoon almond extract
2 tablespoons dark cocoa powder
2-1/4 cups (315 grams) all purpose flour
1. Cream the butter, sugar, and chocolate syrup.
2. Add the vanilla extract and almond extract.
3. Add cocoa. Add flour slowly until the mixture is solid enough to knead.
4. Transfer to your work surface and knead in all but the last 1/4 cup (35 grams) of all-purpose flour.
5. Add up to 1/4 cup (35 grams) more all-purpose flour slowly and carefully, checking the texture of your dough as you go. Stop adding when the dough is still tacky but no longer sticks to your work surface.
6. When the flour amount seems right, wrap and set aside. Do not chill before molding.
7. I recommend molding and baking a test cookie to make sure your dough is correct. If you haven't added enough flour, the cookies won't hold an impression.
8. Preheat the oven to 320°F (160°C).
9. Bake the test cookie for 10 to 15 minutes or until the edges have slightly browned and the top has begun to firm up.
10. Examine the test cookie. If it has spread during baking and the design has become blurry, knead a little more flour into the rest of the dough and repeat the test.
11. When you have good results from the test, form and bake the rest of the cookies.
Recipe: Butterscotch Shortbread
1 cup (225 grams) butter
1/4 cup (50 grams) white sugar
1/4 cup (50 grams) packed dark brown sugar
1 teaspoon vanilla extract
1 teaspoon butterscotch flavoring
2-1/2 cups (350 grams) all purpose flour
1. Cream the butter and sugar.
2. Add the vanilla extract and butterscotch flavoring to the butter mixture.
3. Add flour slowly until the mixture is solid enough to knead.
4. Transfer to your work surface and knead in all but the last 1/4 cup (35 grams) of all-purpose flour.
5. Add up to 1/4 cup (35 grams) more all-purpose flour slowly and carefully, checking the texture of your dough as you go. Stop adding when the dough is still tacky but no longer sticks to your work surface.
6. When the flour amount seems right, wrap and set aside. Do not chill before molding.
7. I recommend molding and baking a test cookie to make sure your dough is correct. If you haven't added enough flour, the cookies won't hold an impression.
8. Preheat the oven to 320°F (160°C).
9. Bake the test cookie for 10 to 15 minutes or until the edges have slightly browned and the top has begun to firm up.
10. Examine the test cookie. If it has spread during baking and the design has become blurry, knead a little more flour into the rest of the dough and repeat the test.
11. When you have good results from the test, form and bake the rest of the cookies.
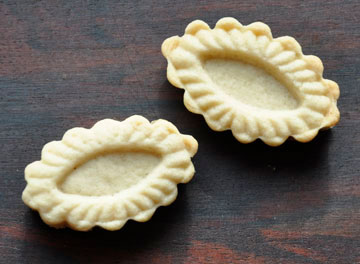
I show these as unfilled shells, but they could be filled with butterscotch ice cream topping, chopped pecans (which you'd bake in the shells), maple cream, chocolate buttercream, or any number of other goodies.
Tip: The Perfect Traditional Shortbread
What got me started on a quest for perfect shortbread was comparing my mom's non-molded shortbread with my own molded version. Mine is prettier but—hands down—hers is more tender, melt-in-your-mouth. I wondered why I couldn't have both.
After a lot of experimenting, I found I couldn't have 100% of both. The reason is that the structure that makes a molded cookie hold its shape comes mostly from the protein, or gluten, content of the flour. My mom's shortbread is better because she uses "soft," or low-gluten flour.
To get down to specifics, she uses White Lily flour. White Lily is about 7% protein. In the US, cake flour, depending on brand, is 5% to 8% protein. Pastry flour is 8% to 9%. All-purpose is 9% to 12%. However, flour varies a lot from one country to another, so if you're thinking about really calculating how to make ideal shortbread, you should look at the flour package to see what you have.
If you don't want to get into math, though, here's how to wing it. If 7% is ideal, you can experiment. If your all-purpose flour is 10%, try mixing half and half with cake flour.
With a dough this tender, you have to use small, uncomplicated molds. The cookie tart molds described below are perfect.
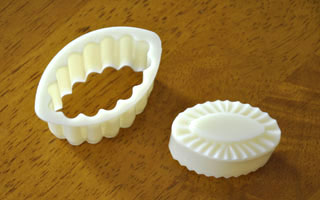
Tip: Making Shortbread Cookie Tarts
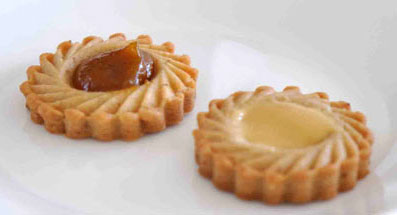
I use my small (about one inch) round "pineapple tart" mold for shortbread cookie tarts. This is a two-piece mold, with an outer cutter and an inner molding stamp, sort of a plunger affair.
The first step is to roll out the dough on a sheet of nonstick aluminum foil the size of your baking pan. It's a good idea—though not necessary—to use rolling pin guides to make the dough a uniform thickness. These are plastic strips that you put on both sides of the dough, and roll the rolling pin over them.
Detailed directions for shaping the cookie tarts are in the November issue of this magazine. I'm mentioning the technique here because these molds really are perfect for shortbread.
When the cookies are cool you can fill them with goodies—I like lemon curd. Also fresh strawberries and whipped cream. Do it at the last minute or they'll get soggy.
March’s Cookie Molds
Symbols of the British Isles, by House on the Hill
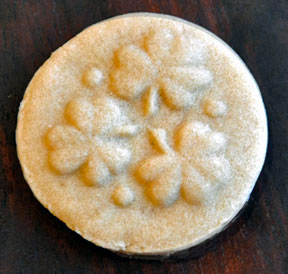
Antique kashigata mold
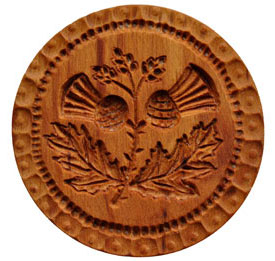
Thistle cookie stamp by HOBI Cookie Molds
Shortbread Thistle Mold, by HOBI Cookie Molds
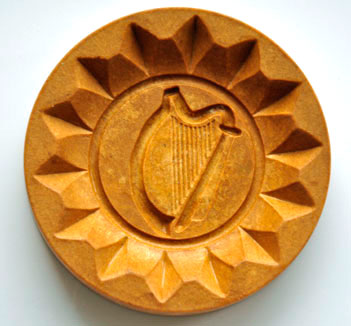
Harp mold, origin unknown
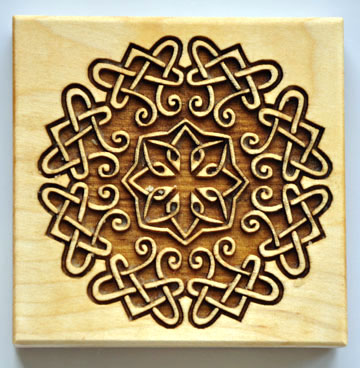
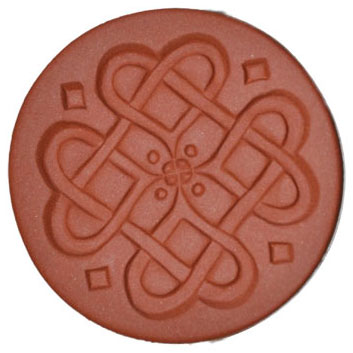
Celtic cookie mold by My Cookie Mold
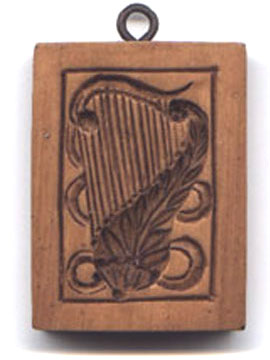
Harp by House on the Hill
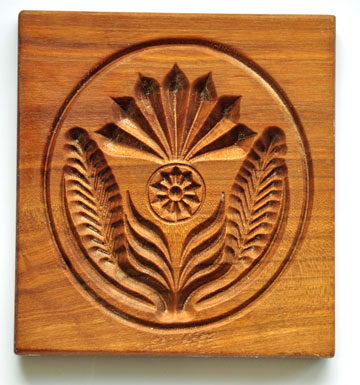
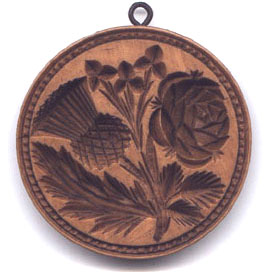
Large Thistle by S.R. White Carving
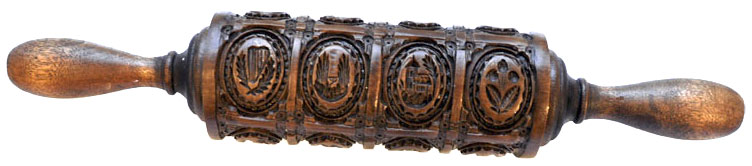
Rustic Victorian rolling pin by House on the Hill
Antique shortbread mold
Oval Tart Mold by Brown Cookie
Woven Hearts Stamp by Rycraft
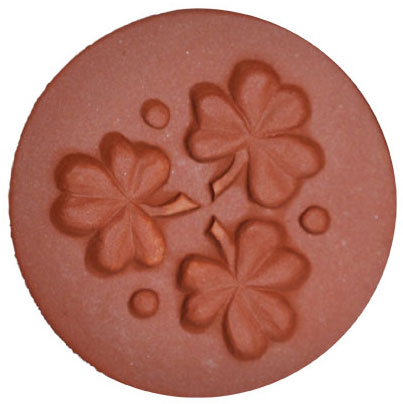
Shamrock Stamp by Rycraft

Round Tart Mold by Brown Cookie