~ AROUND THE YEAR WITH COOKIE MOLDS ~
December
Winter Holidays
My Cookie Molds Books!


Contents
December Holidays
Recipe: Cinnamon Almond Treats
Tip: How to Tell When Cookies are Done
Recipe: Honey Cream Cookies
Technique: Getting a Good Print with an Extra-Large Mold
Tip: Handling Oversize Cookies
Recipe: Maple Gingerbread Cookies
Recipe: Chocolate Raspberry Cookie Tartlets
Recipe: Pecan Cookies
Tip: Trimming Cookies
Tip: Molded Cookies as Christmas Ornaments
December’s Cookie Molds
December Holidays
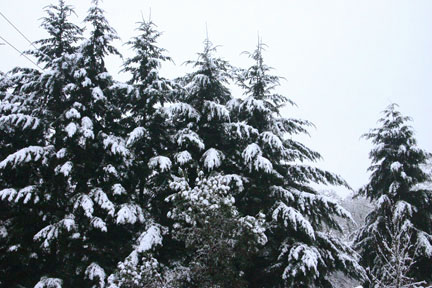
It's cold now, here on San Juan Island. Snow is a possibility every morning, and frost is a certainty. The trees are bare, but we bundle up in layer after layer of coats and sweaters.
And the days are so short. The sun comes up, far in the south, long after breakfast, and it sets long before dinner. This is the time of year when many cultures have celebrations to drive away the dark—Christmas, with all its lights and its star; Hanukkah, the festival of lights; Kwanzaa; Santa Lucia; Midwinter festivals in several cultures; and many others throughout history.
Many homeowners on the island put up Christmas lights, of course, doubly welcome outside the town limits, where there are no streetlights.
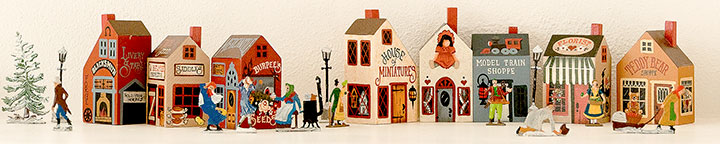
There are decorations, too. I have a tiny model village I put on the mantel for Christmas, and it usually stays for most of the winter. The merchants of Friday Harbor help drive away the dark with a competition to decorate their shop fronts.
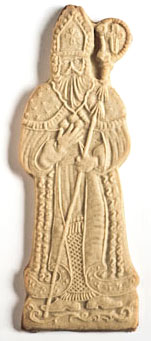
On December 5th, we celebrate St. Nicholas Eve with molded cookies in the shape of the saint with his horse or donkey—some cookie molds show one, some the other. The story of St. Nicholas is not well-known, but he was a real person who performed great acts of generosity and kindness.
It was St. Nicholas cookies that originally sparked my own interest in molded cookies. My husband, Aaron Shepard, is a children's author, and his story The Baker's Dozen is about a baker who learns a lesson of generosity from St. Nicholas himself. As a special gift from Aaron, that book, long out of print, will be published in a new edition this month. See his web page for details.
Near the end of December is the winter solstice, that turning point that tells us that the sun is coming back, even as we see only cold and darkness.
The month ends, of course, with its cornucopia of Christmas cookies! These include almost every secular and religious motif you could think of, from jolly snowmen to medieval manger scenes. Baking cookies for family and friends is a special holiday joy, and in the spirit of St. Nicholas, let's bake some to give away as well.
This month, I feature both traditional and new recipes to bake and share.
Recipe: Cinnamon Almond Treats
Use this recipe to make a molded cookie version of Cinnamon Stars, or make it into cookie tarts with a raspberry filling for Cookie Linzer Torte. You'll find detailed directions for cookie tarts in the November issue of this magazine.
These cookies have a texture somewhat similar to macaroons—soft and slightly sticky. Be careful not to overbake them.
3/4 cup (235 grams) almond paste
1/2 cup (115 grams) unsalted butter
1 large egg
1/2 cup (120 milliliters) honey
1/4 cup (60 milliliters) cream
1/2 teaspoon almond extract
1/2 teaspoon natural lemon flavoring
1/2 cup (100 grams) sugar
2 teaspoons ground cinnamon
1/2 teaspoon salt
About 4 cups (560 grams) all-purpose flour (plain flour)
1. Chop the almond paste, or tear into bits about the size of a small grape.
2. Combine the almond paste and butter in a heatproof container. Warm in a low oven or microwave until the butter is melted. Beat well on high speed until smooth.
3. Add the egg and beat until well mixed.
4. Mix the honey, milk, almond extract, and lemon flavoring. Add to the butter mixture and beat until well mixed.
5. Mix the sugar, cinnamon, and salt. Add to the butter mixture and beat until well mixed.
6. Add flour slowly until the mixture is solid enough to knead.
7. Transfer to your work surface and knead in more flour to make a soft, slightly sticky dough.
8. Wrap or cover the dough and refrigerate for up to 1/2 hour, until it is firm but still flexible.
9. Roll and form the dough with a cavity mold according to the directions for your mold, or use the directions in my book Baking with Cookie Molds.
10. Bake for 10 to 15 minutes or until the edges have slightly browned and the top has begun to firm up. Be careful to avoid overbaking, or the cookies will become too hard as they cool.
For an extra-special dessert cookie, apply the chocolate backing from Baking with Cookie Molds, using white chocolate flavored with a little cinnamon and/or finely grated lemon peel.
For the Cookie Linzer Torte filling, use seedless raspberry jam, which you may mix with soft cream cheese or almond paste. If desired, flavor to taste with cinnamon, finely grated lemon peel, and/or raspberry liqueur.
Tip: How to Tell when Cookies are Done
Cookies are done when they’re brown, right?
Well, no. By the time cookies look brown, they’re overdone.
For one thing, just like a roast or a casserole, cookies don’t stop cooking suddenly when you take them out of the oven. So don’t wait until you’re sure they’re done to take them out. If they really are underbaked when they’re cool, you can always bake them a little more—unlike a cake, they won’t get ruined from this approach.
Keep in mind that an oven light, if you have one, doesn’t give you the best color rendition. Mine always makes the cookies look paler than they really are. If I trust it, I end up with overbaked cookies.
Cookies are usually done when they’ve just started to brown at the edges. Given the lighting problem with ovens, you may have to remove the sheet and look at it in natural light to get a good view of this.
But the big thing is how the bottom of the cookie looks. If it is slightly brown, with no doughy-looking spots, the cookie is done, regardless of the color. So I take my cookie sheet out of the oven, put on a heat glove (or use a spatula), flip a cookie over, and check the bottom.
And sometimes, depending on airflow in your oven, part of a sheet of cookies will be ready while the rest need more time. If that happens, there’s no problem with taking the cookie sheet out of the oven, removing the fully baked cookies, and returning the underdone ones to the oven.
I usually put the cookies on a cooling rack right away. Occasionally, I have a very large cookie that seems not quite done in the middle, but is getting too brown at the edge. I’ll leave it on the cookie sheet for a few minutes to let the stored heat in the metal help it finish cooking.
Two-layer baking sheets with air in the middle will keep cookies from actually burning, but they still overbake. Since these sheets can’t be washed in the dishwasher, I’m not a fan.
One thing to remember is an old saying: “If you can smell it in here, it’s burning in there.” Use a timer.
Recipe: Honey Cream Cookies
This recipe is good with any kind of honey, but it's especially nice with specialty, strong-flavored honey such as sage or maple. You can add flavoring extracts if you want lemon, orange, almond, or whatever.
1/2 cup (115 grams) butter
1/2 cup (120 grams) softened cream cheese
1 large egg
1/4 teaspoon salt
1 cup (240 milliliters) honey
1 teaspoon vanilla extract
2 tablespoons whipping cream
About 4 cups (550 grams) all-purpose flour
1. Melt the butter. Add the cream cheese, broken into small pieces. Set aside.
2. Beat the egg in a large bowl. Add the salt and mix well.
3. Mix the honey, vanilla extract, and cream. Add to the egg.
4. Add the butter mixture slowly to the egg mixture and beat well.
5. Add flour slowly until the mixture is solid enough to knead. If you’re using an electric mixer, stop the mixer once or twice as you’re adding flour, and scrape the sides of the bowl to get all the flour mixed in.
6. Transfer the dough to your work surface and knead in more flour to make a soft, slightly sticky dough.
7. Wrap and refrigerate the dough for 30 minutes.
8. Roll and form the dough according to the directions provided with your cookie mold, or see the appendix of this book for basic cookie forming directions.
9. Chill the cookies while you preheat the oven to 350°F (177°C).
10. Bake small cookies for ten to fifteen minutes until slightly browned at the edges.
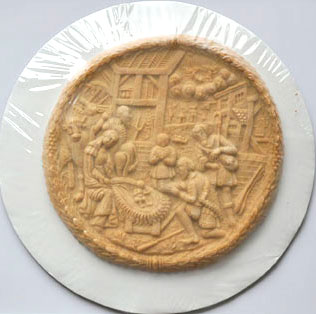
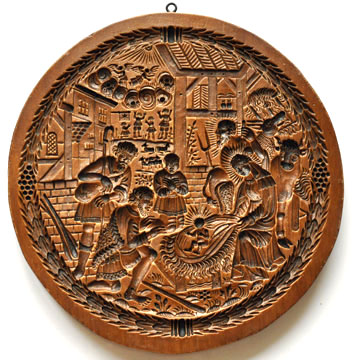
If you’re making a very large cookie such as the “Shepherd Nativity,” which is ten inches in diameter, use a lower oven temperature—300°F (150°C). Bake until firm. This will probably be much longer than the time given for smaller cookies, so check the cookie about every ten minutes.
This recipe makes a soft, mild-flavored cookie. Because it's sweetened with 100% honey, it works especially well with large molds such as the "Shepherd Nativity" mold shown here. Since the dough is very pale, make sure it's perfectly smooth before you mold the cookie—otherwise, any wrinkles will show up and spoil the design. If you want a stronger flavor, 1-2 teaspoons of flavoring extract may be added. Almond, rum, or brandy extract would be good choices.
The cookie is shown packaged for giving, using a cake board and shrink-wrap. You could add ribbons or other trim to complete your package.
Here are a few smaller cookies made with this recipe.

Technique: Getting a Good Print with an Extra-Large Mold
Large molds can present a special problem—you may not get a good print across the whole mold unless you work carefully. Here are some places that need special attention:
Border: Most large cookies have beautiful, ornate borders. This is the point where I have made the most mistakes. You must make sure to press hard all around the border, or you’ll have an incomplete print.
Special Points: In the “Shepherd Nativity” mold, which I used to make the cookie in the previous section, the special points are the baby in the manger, the people’s faces, and the animals’ heads. If you get an incomplete print on any of these, the cookie won’t look good. I had a lot of trouble with this until I marked the back of the cookie mold with a permanent marker, putting an X on the back of each place that needed special attention. I actually pound on the mold with my fist at those points to make sure I get a good print.
Tip: Handling Oversize Cookies
Oversize cookies are delicate, especially when they're hot. And most spatulas and cookie lifters are too small to be useful with cookies that are a foot or more in height.
Of course, you make oversize cookies on a sheet of foil or parchment, and that's helpful in handling them. But, especially for the very large "exhibition cookies," a foot or more tall, a flexible sheet may not work well by itself.
Fortunately, there are several great tools to help with this, but they aren't cookie utensils. You'll find the best tools for oversized cookies if you look for pizza and barbecue tools.
You can sometimes find barbecue spatulas big enough to flip a whole steak on a grill. And pizza lifters come in different sizes, from about twelve inches round to the huge "peel" that's used for large pizzas.
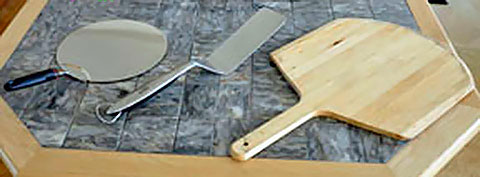
Even a cookie sheet can be used as a lifter, if it has one or more flat edges. Just don't try to move a large cookie that's right out of the oven without supporting the entire thing. They’re easier to handle when they've cooled thoroughly, but of course, you have to move them to get them onto a cooling rack.
Recipe: Maple Gingerbread Cookies
1 cup (225 grams) unsalted butter
1 large egg
2 tablespoons (25 grams) brown sugar or maple sugar
6 tablespoons (75 grams) granulated sugar
1 teaspoon cinnamon
1/2 teaspoon ground ginger
1/4 teaspoon salt
1/2 cup (120 milliliters) maple syrup, see note
1 tablespoon finely grated fresh ginger, optional, see note
About 4 cup (574 grams) all-purpose flour
1. Melt the butter and set aside.
2. Beat the egg in a large bowl until the yolk and white are fully mixed.
3. Mix the sugar, brown or maple sugar, ground ginger, cinnamon, and salt. Sift this mixture to remove lumps.
4. Add the sugar mixture to the egg.
5. Mix the maple syrup and grated ginger and add to the egg mixture.
6. Add the butter slowly and beat well.
7. Add flour slowly until the mixture is solid enough to knead.
8. Transfer to a counter or breadboard and knead in more flour to make a soft, slightly sticky dough.
9. Wrap or cover the dough and refrigerate for up to 30 minutes, until it is firm but still flexible.
10. Roll and form the dough with a cavity mold according to directions in my book, Baking with Cookie Molds.
11. Chill the cookies while you preheat the oven to 350°F or 175°C.
12. Bake about 15 minutes or until slightly browned at the edges.
If you really love maple flavor, try to find Grade B maple syrup. Grade A has a lighter flavor that's great on pancakes, but the more robust Grade B is better for baked goods.
Here's how to get super-fine grated ginger: When you buy the ginger root, wash it and freeze it, peel and all. Note: Never let this ginger thaw. You can’t re-freeze it.
Grate it frozen. I use a Microplane grater (and the protective glove made for it—those things can really slice your hands). I lay the ginger on a cutting board and rub the grater over it—I find it faster and easier than rubbing the ginger on the grater.
If you don't want the extra-spicy taste of fresh ginger, you can use 1 tablespoon of powdered ginger instead. If you do, add it to the sugar mixture along with the cinnamon.
Recipe: Chocolate Raspberry Cookie Tartlets
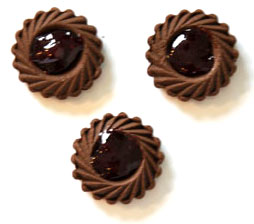
More cookie tarts! I chose the tart mold for these because the dark chocolate dough is too dark for most others. If you need directions for using the tart molds, you'll find them in the November issue of this magazine.
4 ounces (115 grams) bittersweet or dark chocolate
1/2 cup (115 grams) unsalted butter
1 large egg
1/2 cup (100 grams) sugar
1/2 teaspoon salt
2 tablespoons baking cocoa
2 tablespoons raspberry liqueur, see note
1 teaspoon vanilla extract
1 teaspoon chocolate extract
About 2 cups (280 grams) all-purpose flour
1. Warm the chocolate and butter together in a low oven or microwave until the chocolate is soft and the butter is melted. The chocolate may hold its shape when soft, so test with a spoon to avoid overcooking.
2. Stir the chocolate and butter together. Set aside.
3. Beat the egg in a large bowl until yolk and white are fully mixed.
4. Mix the sugar, salt, and cocoa. Sift to remove lumps.
5. Add the sugar mixture to the egg.
6. Add the liqueur, vanilla extract, and chocolate extract to the egg mixture.
7. Add the chocolate mixture to the egg mixture.
8. Add flour slowly until the dough is solid enough to knead.
9. Knead in additional flour until the dough is the consistency of children's modeling clay.
10. Using a tart mold, press out cookie tart shells. Complete illustrated directions for using cookie tart shells are available in the November 2010 issue of this magazine.
11. Bake the cookies at 350°F (175°C) for ten to twelve minutes.
For the raspberry liqueur, you can substitute 2 teaspoons raspberry flavoring.
For the raspberry filling, you may use sieved raspberry jam. Or mix it with softened cream cheese, and/or raspberry liqueur.
If you prefer, substitute other flavorings or liqueur such as hazelnut, coffee, or almond for the raspberry liqueur, and fill the tart shells with chocolate buttercream, chocolate almond butter, nutella, or other filling of your choice.
Recipe: Pecan Cookies
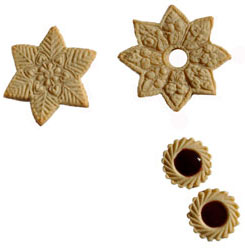
Pecans are a special Christmas treat, and they make wonderful cookies. The toasted flavor that develops as they bake is really delicious. For this recipe, use a mold design that will look good with a slightly tweedy, flecked appearance.
1 cup (225 grams) butter
1 large egg
1/2 cup (120 milliliters) honey
1/2 cup (98 grams) brown sugar
1/2 cup (80 grams) finely ground pecans, see note
1/4 teaspoon salt
About 4 1/4 cups (560 grams) all-purpose flour
1. Melt the butter. Set aside.
2. Beat the egg in a large bowl.
3. Add the honey to the egg mixture.
4. Mix the brown sugar, ground nuts, and salt. Add to the egg mixture.
5. Add the butter slowly and beat well.
6. Add flour slowly until the mixture is solid enough to knead. If you’re using an electric mixer, stop the mixer once or twice as you’re adding flour, and scrape the sides of the bowl to get all the flour mixed in.
7. Transfer to a counter or breadboard and knead in a little more flour if required to make a soft, slightly sticky dough.
8. Wrap and refrigerate the dough for 30 minutes.
9. Roll and form the dough according to the directions your cookie mold, or use the basic directions in the appendix of this book
10. Chill the cookies while you preheat the oven to 350°F (177°C).
11. Bake for 10-15 minutes or until slightly browned at the edges.
You may be able to buy ground nuts, or you can grind them in a food processor or blender with a cup or two of the flour (which keeps the nuts from turning into nut butter).
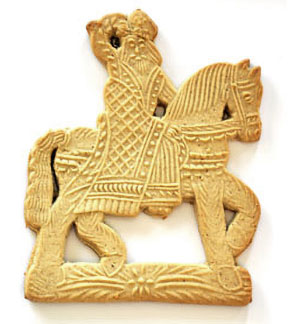
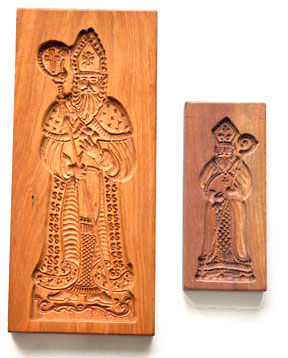
Tip: Trimming Cookies
If your cookie has enclosed areas that aren’t part of the design, you have a choice—to trim them out or not. They can be attractive either way.
Here are two cookies made with an antique St. Nicholas mold, untrimmed and trimmed.
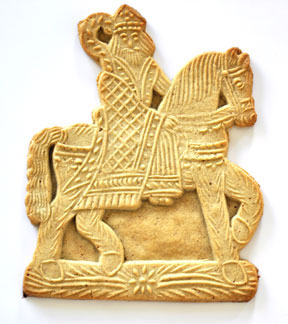
If you do trim around the horse’s legs and bridle, and the Saint’s arm and staff, there are a few tricks to make it easier: Chill the cookie well before doing any trimming, either the outline or the details. Leave as much dough as possible around the edge. Use a sharp craft knife. Trim out the details before trimming around the edges of the cookie. The cookie is much less likely to tear if you trim the small, delicate pieces first.
Tip: Molded Cookies as Christmas Ornaments
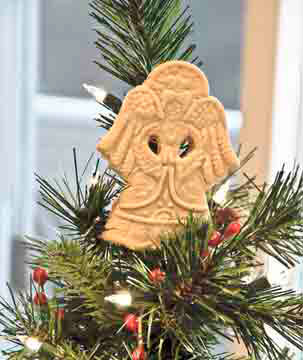
There are two ways to do this. One is to make real cookies and use them as ornaments, as in the photo to the left. This is feasible if you live in a climate where bugs and other pests aren’t a problem. If you use real cookies, you’ll probably throw them away at the end of the season, or you could freeze them for use in following years.
You’ll need to select forms that can be secured to the tree, or you can wrap the cookies tightly in plastic wrap or shrink-wrap and secure the wrap to the tree. In the photo above, you can see a loop of clear fishing line around the angel’s waist if you look closely.
Another way to have molded cookie ornaments is to use polymer clay, salt clay, or papier mâché in your cookie molds. However, I doubt if this is a good idea with a mold that shouldn’t be washed, such as a wood mold. Not if you’re planning to use it for food again.
Whatever medium you use, follow the directions that come with the art material.
For paper or clay cookies, you can embed thin wire in the backs for fasteners. Or glue them, using a glue recommended by the manufacturer of the art material. You'll get a better bond if you thread your wire through a piece of cloth and glue that to the back of the cookie. The cloth should cover as much as possible of the cookie without showing from the front, because the larger the glue contact area, the better the bond.
For outdoor ornaments such as wreaths, art materials would be the only practical choice. You can make a wreath entirely out of different colored cookies “decorated” with acrylic paints, or you can apply clay or paper cookies to a natural or artificial wreath.
Real cookies used as decorations could be packed carefully in freezer containers and frozen for re-use the next year—however, I've only done this with plain cookies, and don't know whether it would work if they're frosted.
December’s Cookie Molds
St. Nicholas molds by HOBI Cookie Molds
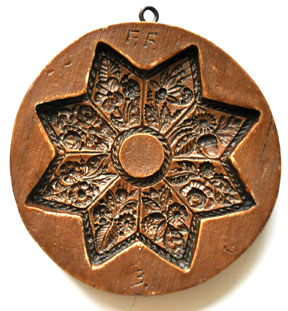
Eight Pointed Star by House on the Hill
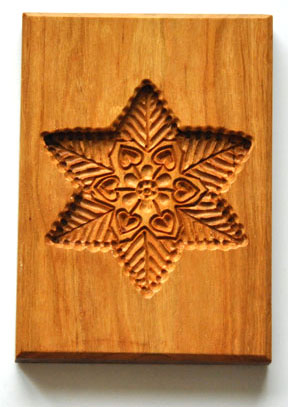
Six Point Star by HOBI Cookie Molds

Cookie Tartlet Mold from Biodiversity Herbs.
Shepherd Nativity by House on the Hill
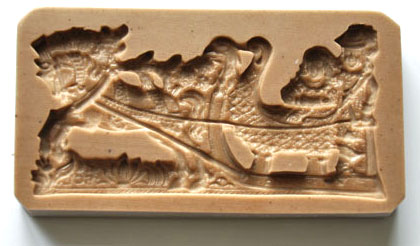
Winter Sleigh Ride by The Springerle Baker
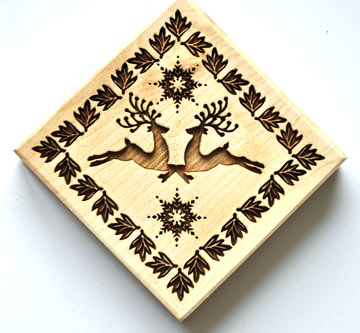
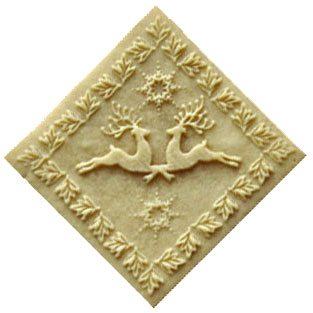
Dancing Duo by My Cookie Mold
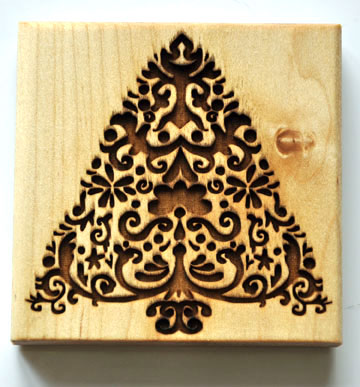
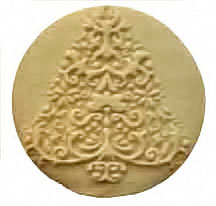
Christmas Tree by My Cookie Mold

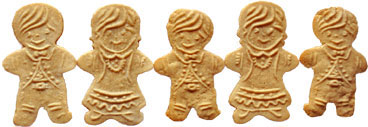
Gingerbread Kids by HOBI Cookie Molds
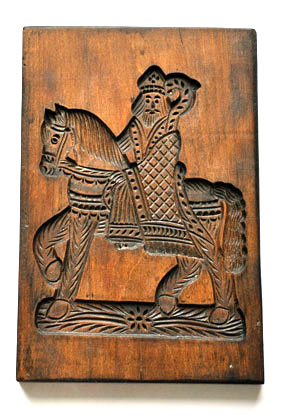
Antique cookie cold, St. Nicholas on horse
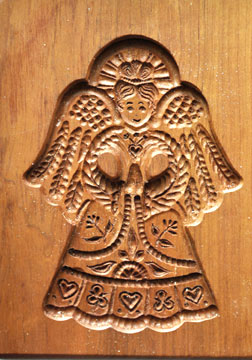
Angel Cookie Mold by HOBI Cookie Molds