~ CREATIVE SOAPMAKING ~
November
Natural Colorants
Pumpkin Pie Soap
Taming Soda Ash
My Soap and Lotion Books!


Contents
Natural Colorants in Soapmaking—Why?
Using Natural Colorants in Soapmaking
Colors, Oils, and Soap
Plant-Based Colorants
Other Natural Colorants
Basic Colored Soap #1
Basic Colored Soap #2
Alkanet Root Soap Experiment
Madder Root Soap Experiment
Pumpkin Pie Soap
What Would I Do?
Taming the Soda Ash Monster

Natural Colorants in Soapmaking—Why?

The main reason for using natural colorants is that they produce beautiful, subtle shades. Used correctly, these colors are stable.
Also, many soapmakers want to avoid dyes and artificial colors in their soaps. One of the reasons for making soap yourself to begin with is to avoid artificial ingredients. But supposing you want soap that isn't ivory-to-beige, you usually would have to color it with something.
Of course, most oils contribute some color—one of the prettiest soaps I ever made was a pale celadon green, the color being pure serendipity, the colors of the oils I used. So oils can contribute color, as can liquids, if you use something other than water. And if you infuse one of your oils with herbs or flowers, that will affect the color as well. Finally, if you use essential oils or fragrance oils, they too may affect the color of the soap. Anything containing vanillin, for example, will slowly turn to a dark brown, and other fragrances have more subtle color.
But when we talk about natural colorants, most of the time, we're talking about natural ingredients that are used only for their color, or mostly for that. So: Ingredients other than the base oils, EO or FO, and liquids that are part of the soap formulation itself.
Like artificial colorants, strong natural colorants shouldn't be used too heavily, or you will get color that comes through in the lather and may even stain linens. For a more intense effect with less color, swirling or marbling may be a good choice.
However, not all natural colors are strong. Some fade almost to white before the soap even sets. Others turn out splotchy, grayed, or dull. One of my failures was soap I made with cranberry juice for liquid. It turned out an ugly grayish white—completely different from the color from orange or tomato juice, which both make a stable orange.
I read that liquid cochineal is a very strong color, and that "it doesn't take much." It didn't work that way for me. I added more and more, and more again, and after a few turns with my blender, the soap would be back to pale pink. Finally I had to pour it—and it faded even more as it cured. In the end, it was pure white. Possibly there was something wrong with the product I bought, but I couldn't find any other, so my cochineal experiment was not a success.
Some soapmakers do preliminary testing with a colorant, first in the oils they plan to use, then in a lye solution, and finally in a test batch of soap. That's probably a good idea, though I've never been that methodical.
One thing to remember in discussing natural colorants is that it's possible to use more than one at a time. So, if you want an apple-green shade, for example, the way to get it may be to mix green and yellow, rather than to look for a single natural colorant that will give you the exact shade you want.
Professional soapmakers who use natural colorants often opt to use only a few. They've worked out good technique for consistent results with these colors, and they stick with their tried-and-true methods and formulations. They're also likely to find a supplier whose products they like, and to continue to buy from that same vendor.
Using Natural Colorants in Soapmaking
When colorants are natural, that doesn't mean they aren't chemicals. Everything's a chemical, including our own bodies. Natural colorants can and do react with the lye, or with other ingredients in the soap.
Solid powders can be steeped in one of your base oils, or may be added to the soap at trace. Mix the powder with part of the base oil if you do add at trace, so you don't get lumps. Or mix it with some of the soap. (You'd start from light trace, if you do this, so you'll have enough time.) Powders can be scratchy if added at trace, so you'd have a scrubby soap. If your powder tends to irritate the skin, it may well be more irritating if added at trace than if it's infused in the base oils and sieved out.
I always freeze liquids other than water. If your main colorant is a liquid such as fruit juice, beer, or tea, I recommend freezing.
Plant-based colorants may morph in contact with lye, temporarily or permanently. Or the lye may destroy the color altogether—I was not successful with either cranberry juice or cochineal. Both soap batches lost the red color completely.
Mineral colorants are stable. What you see is pretty much what you get.
Results with some colorants may be inconsistent or uneven. Results may vary with products from different vendors.
If your color is too intense, you may get colored lather, and the soap may stain linens. Some colors, used in a higher concentration, are a nuisance to clean out of your bathtub.
Some natural colors are also used as dyes for fibers and other materials. Powders or oil infusions of these colors may stain your clothing or other absorbent surfaces.
Test the soaps critically with respect to lather and texture. The loveliest color in the world won't work if the soaps are scratchy or low-lathering.
Some soapmaking books tend to gloss over the fact that trial and error is part of everyone's process. That leaves many readers thinking they're the only ones who have to try several variations to get what they want. But all that is normal.
Colors, Oils, and Soap

The color of a soap comes from everything in it. If you're using a natural color that's the opposite of one of your oil colors, or if you mix two natural colors that are opposites, you'll get gray—or possibly brown, depending on which colors are used in what proportions.
Opposite colors are identified graphically in a traditional color wheel, such as shown above (courtesy of MarianSigler Images). To simplify and summarize:
Red is the opposite of green.
Yellow is the opposite of purple.
Blue is the opposite of orange.
So, for example, if you're aiming for a pink or reddish soap, you'd think twice before using a strongly green olive oil. If you're making purple soap, you might prefer not to use a fragrance oil with a strong yellow hue.
I have two basic recipes in this lesson. One recipe contains olive oil, which may add color—greenish to beige—to soaps. If that would work well with your colorant, it's a good choice. The other recipe is about as flat white as it can be. Use this with colors that don't work well with green, like reds and oranges, or to maximize the brightness of natural colorants. (For more information about the effect of oil color on soap color, see October's wine soap experiments.)
Another consideration, if you're infusing color in one of your oils, is the percentage of that oil in the soap formulation. If your soap has a high percentage of that oil, you may wish to infuse only some of the oil with colorant and leave the rest without.
In the experiments described below, none of the soaps contain any fragrance or essential oil, or any other additives besides the colorant.
Plant-Based Colorants

Vegetable colorants include herbs, seeds, spices, and liquids such as juices, wine, beer, and coffee. Some plant-based colors are more stable than others, and it's a good idea to either research a plant product for soapmaking or start with a small experiment. Some plants produce surprising colors—not the color of the original material at all. Or it may be a variation of the original color—usually duller. Some plant colorants can be irritating to the skin if too much is added.
The range of colors is wide. I've experimented with many, but the possibilities are more or less endless. You can get color by steeping plant materials in your liquid, infusing your oil with them, using juice for your liquid, or adding them directly to the soap. If you do add them directly, you may use them to make the soap scrubby or exfoliant. Or you may make them as smooth as possible.
Natural colorants may not produce as even a result as you might get with artificial colors. However, for many of us, that's part of the charm. Some may fade more quickly than you'd like.
If you don't get good results adding a vegetable colorant to the liquid oils, try adding it when the soap is near trace. The effect of the lye will be somewhat reduced at that point—though it isn't eliminated.
There are hundreds of possibilities, far more than I can test. Here's a selection.
Teas and Other Liquids
You can make a tea out of any plant material that has water-soluble color in it. The procedure is the same as if you're making tea to drink: Pour hot or boiling water over the plant material, let it steep, and strain out the solids.
Other liquids may include fruit and vegetable juices, coffee, chocolate milk—almost any liquid that has a strong color of its own.
Liquids other than water may produce ammonia-like fumes. Have good ventilation!

Orange juice and peel used as coloring. The color of this soap held up well.
Oil Infusions

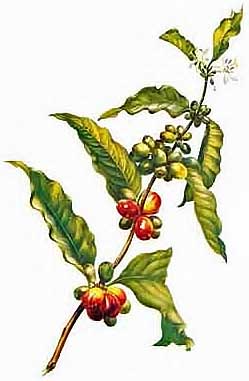
Annatto
Oils may be infused with solids such as spices, herbs, and powdered colorants such as annatto, alkanet, or madder root. In order for an oil infusion to work, at least some of the plant material's color must be oil soluble.
Some powders will make a usable infusion if you mix the oil and the powder and let them sit for a while, stirring occasionally. With others, heating the oil with the colorant is recommended to extract the color. Ask the vendor, or find out what has worked for others. Some colorants are affected by high pH, and with those, it's often best to add them at light trace. Mixing the powder with a little oil can help with color evenness and prevent speckles. Powdered colors added at trace may make the soap gritty, depending on how much you add.
With spices, the color you get in soap is pretty much what you'd expect from looking at the powder. The scent may survive saponification, too—so, if that's not what you want, it may be best to try a different colorant for the effect you want.
Spices are said to be skin irritants. However, soap itself is a skin irritant—as you know if you've ever failed to rinse it off! I'm sure that spice essential oils can concentrate this irritation, but I'm not sure powdered spices are actually likely to make much difference. If you're selling soap, though, you're well advised to tread carefully here. You have little or no control over how people use your product.
Dried herbs work better than fresh, in my experience—and I'm referring to thoroughly dried herbs, such as ones you'd buy for cooking. My efforts with fresh or casually home-dried herbs didn't turn out especially well. The infusion became cloudy, possibly moldy, before it changed color to any great degree.
The amount of colorant varies depending on how strong a color you want, but one teaspoon of powdered colorant per ounce of oil is a starting point. Strain the colorant out of the oil before you make soap.
I've had an unusually high amount of soda ash with spice-infused oils.

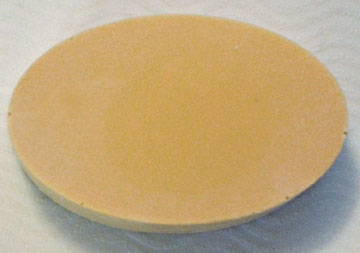
Soap made with annatto seed
Dry Colorants
Spices and other granular ingredients such as cocoa may be added dry. They're likely to give you a more intense color, and may also be more likely to irritate skin, compared to when infusing oil and straining it.
One way I've used powdered dry colorants is to blend them thoroughly in the oil before adding the lye mixture. Another is to mix the powder with a little oil and add at trace. This is one way to get around color morphing, if your colorant is sensitive to pH.
How much to use? It depends how strong you want the color to be—but many soapmakers start with one teaspoon of dry powdered colorant per pound of oils.
Another way to use dry colorant, if the powder is water soluble, is the "tea dye" method: Make a strong "tea" with the colorant, filter out the particles, and add it at trace. (See the madder root experiment below.) I call this "tea dye" because it's different from simply making a tea with the powder and replacing the liquid with it. With this method, your "tea" is so concentrated that it's actually a natural dye, and you're adding it when the lye has been mostly neutralized by the acids in the fats. This is very effective with colorants that react badly to high pH.
Other Plant Materials
Flecks of cucumber or citrus peel may be used for both color and texture. Coffee grounds can be added for a scrubby, somewhat deodorant kitchen soap.
Other Natural Colorants
Animal Product Colorants
Some natural colors come from animal products. Milk soap will turn brown if it's not chilled, and many people like the brown color. Cochineal is derived from insects.
Mineral Colorants
Clays of various kinds are mined and processed for soapmaking use. They can give a surprising array of colors, including green, orange, red, gold, pink, yellow, and white. The description the vendor gives should be enough to let you know exactly what to expect. Note, though, that clay does change the texture of soap. That's desirable for some soaps, especially shaving soap. But again, don't use too much, or the soap won't lather well.
Mineral colorants such as ultramarines and oxides aren't technically natural, since they're manufactured products. But they are replicates of naturally occurring minerals, artificially produced for purity.
Mineral colorants and clays are easy to use for creating swirls and other patterns, since they don't bleed.

Basic Colored Soap #1
This is my usual recipe for testing colorants, with 70% olive oil and 30% coconut oil. It's best to use with colorants that will work with a greenish or pale beige background color.
Test Batch Size
This makes two individual bars of soap. Making a tiny test batch like this is the way I start out with every new recipe. Weights are in grams only, because I don't recommend using ounce quantities for such small amounts—grams are more accurate, and accuracy is crucial when making small batches.
64 grams coconut oil
149 grams olive oil
64 grams liquid
30 grams lye
Full Batch Size
This is my typical 30-ounce batch. Still a small batch, about eight bars.
9 ounces (255 grams) coconut oil
21 ounces (595 grams) olive oil
9 ounces (255 grams) liquid
4.2 ounces (121 grams) lye
If the liquid I use is anything but water, I freeze it. If I'm using sugar, honey, or other water-soluble additives, I add them to the liquid before freezing. If I'm using botanicals, purees, grains, or anything else that's not water soluble, I add it to the oil mixture and blend well before adding the lye mixture.
Variations
Cinnamon Soap—Warm brown, retained some cinnamon fragrance.

Cocoa Soap—Light brown, no chocolate fragrance. Sift the cocoa to eliminate lumps.

Coffee Soap—Tan, with speckles from added coffee grounds. I expected a darker color, since I used strong black coffee.

Sage Soap—Expecting green, which is what other soapmakers had reported, I infused olive oil with commercial culinary dried sage, using the concentration recommended on several web sites that discussed natural colorants. Even after several weeks, the oil did not look different from ordinary olive oil. When the soap ingredients were combined, though, the mixture first turned bright red, then faded through salmon, khaki, tan, and beige, finally ending up pale green. A very nice color, but the process of getting there was quite startling.

Yarrow Soap—Made with the "tea dye" method. The night before I made the soap, I made a strong tea with yarrow powder. In the morning, I filtered it and set it aside. I withheld 20 grams of water from the 64 called for in my Test Batch Size formula (so only used 44 grams of water to dissolve the lye.) I made the soap otherwise per the recipe, and added 20 grams of the yarrow tea at trace. The result was a pale, clear yellow.

Turmeric Soap—And finally . . .
Basic Colored Soap #2
This soap is flat white before colorant is added. I test with this one when a colorant might be in conflict with the natural color of olive oil. Good for warm shades like red, orange, and yellow.
Test Batch Size
Makes two bars. As with Basic Colored Soap #1, weights are in grams only, because I don't recommend using ounce quantities for such small amounts.
70 grams almond butter
72 grams coconut oil
70 grams almond oil
64 grams liquid
30 grams lye
Full Batch Size
9.9 ounces (281 grams) almond butter
9.9 ounces (281 grams) coconut oil
10.2 ounces (289 grams) almond oil
11.4 ounces (323 grams) liquid
4.3 ounces (122 grams) lye
Variations
Paprika Soap—I did not find this soap irritating. However, I used it only on my hands, and I don't have sensitive skin.

Carrot Juice Soap—Carrot juice used for 100% of the liquid. Very strong fumes. Color faded from orange to pale yellowish tan as the soap cured.

Alkanet Root Soap Experiment

All soaps in this experiment were made with the recipe for Basic Colored Soap #1, as given above (with 70% olive oil, 30% coconut oil). The infused oil was reddish purple.
In the first batch, all the olive oil was infused oil. The soap was originally reddish purple, but it changed to deep navy blue as it cured. The soap was too dark, and the blue color also appeared in its lather. Usually, when this is the case, you'll stain linens when you use it—sometimes temporarily, sometimes not.

In the second batch of alkanet root soap, about a fourth of the olive oil was the infused olive oil, the rest was regular olive oil. The soap turned out dark pink.

I made one more batch with alkanet root, this time using very little of the infused oil. For about twelve hours, the soap was a bright gold ochre shade. After curing, it became golden pinkish beige.

Madder Root Soap Experiment

Dyer's Madder, from an old herbal
The first two soaps were made with the recipe for Basic Colored Soap #2, given above (with approximately equal proportions of almond butter, almond oil, and coconut oil). The infused oil was red. The only difference between the two batches was when the madder root was added. Infusing the almond oil with madder root before making the soap produced the gray soap on the left. Adding madder mixed with a little almond oil at trace produced the rose-colored soap on the right. Note the speckles in the second soap—many soapmakers complain that the undissolved powder makes the soap scratchy.

Two soaps made from the same recipe and colored with madder root
I made a third batch, using Basic Colored Soap #1, to see if I could get rid of the speckles. Madder root is soluble in water, so I made a strong "tea" with the madder and boiling water. I put the liquid through first a fine sieve, then a coffee filter. I held back some of the liquid when I dissolved my lye—12 grams out of the 64 I normally use for my test batch size. At trace, I added my madder "tea dye."
Success! The color was more of a peach shade than pink, probably because I used Basic Colored Soap #1, which has more color contribution from the oils. If I'd been aiming for a true pink, I would have used oils with as little color as possible, like the ones in Basic Colored Soap #2.

Madder root soap from "tea dye" method
How did I know madder root was soluble in water? I typed "Is madder root soluble in water" into my browser. Of course, another sure way to find out is to just try it and see if it works. If the powder is water-soluble, the water will be colored and stay like that, even after standing awhile. If the powder isn't water-soluble, it will sink to the bottom, leaving more or less clear liquid on top.
How did I know how much madder to use in the tea? I didn't. I used too much—in other words, more than the water could hold in solution. So, I wound up filtering out the excess.
How did I know how much tea to use in the soap? Again, I didn't. I tried what seemed like a reasonable amount, knowing that the color fades somewhat as the soap cures. If I hadn't liked the results, I would have used a different amount in another test batch. As it happened, I was happy with the result.
How much water can you safely withhold from the lye solution? Theoretically, you can dissolve 1 gram of lye in just .9 gram of water. I suspect you'd get fast trace with such a concentrated solution. The lowest proportion I've used in this method is about 1 gram lye to 1.5 grams water. I had no problems with that.
Pumpkin Pie Soap

9.9 ounces (281 grams) almond butter
9.9 ounces (281 grams) coconut oil
10.2 ounces (289 grams) almond oil
1.2 ounces (34 grams) pumpkin pie fragrance oil, or as recommended by vendor (optional)
11.4 ounces (323 grams) half and half (light cream), or yogurt mixed half and half with distilled water, or milk
1½ teaspoons sugar or honey
2 ounces (56 grams) pureed pumpkin
1 teaspoon pumpkin pie spice (optional)
4.3 ounces (122 grams) lye
1. Mix the half and half thoroughly with the sugar or honey. Melt the solid fats and add to the almond oil. Add fragrance, if using.
2. Combine lye with frozen ingredients. When all the lye is dissolved, add to the oils and blend nearly to trace.
3. Add the pumpkin puree and spice, if using.
I recommend tray molds or individual molds for any soap that contains milk.
Pumpkin pie fragrance will likely turn the soap brown, as it probably contains vanilla. Avoid it if you want an orange color.
If you want the soap to be more orange, consider using carrot juice, orange juice, powdered orange peel, or another orange colorant in addition to the pumpkin.

What Would I Do?

Before I tried natural colors, I imagined they would be less interesting and less stable than they turned out to be. As a general rule, I don't color soaps at all—but if I wanted to, I'd now try natural colorants in preference to anything else.
But you do have to work out the best technique for a particular colorant. If you want a particular natural color, spend time on research and experimenting. Test on a very small level before committing to a final formulation and technique.
If you don't get good results with one technique, try another. Adding the color at trace—whether in oil or in water—often alters the results dramatically.
Taming the Soda Ash Monster
What Causes Soda Ash?
I must have heard dozens of theories about the reason for soda ash. Here are some I remember.
It happens mostly with high sugar soaps, like milk soap.
It happens when there's some kind of disturbance in the natural temperature cycle of saponification and curing.
It's caused by weather and atmospheric conditions.
It's caused by air contacting the soap.
It's a chemical reaction caused by specific ingredients.
It's caused by pouring at thin trace.
It's associated with particular oils.
It's caused by unmolding the soap too soon.
It's completely random.
Which is true? I've had experiences that support every one of these theories. And experiences that would seem to disprove most of them. The most bizarre experience I know of didn't happen to me, but to a friend, who I know is a good soapmaker. She made a batch of soap and poured into two molds, which were handled identically. One got soda ash, the other didn't.
What Prevents Soda Ash?
I've probably heard dozens of theories about preventing soda ash, as well.
Spread plastic wrap across the surface of the soap. (I've advised this myself.)
Put the soap mold in a closed box or bag after pouring.
Insulate the soap.
Spray the top with 92% alcohol after pouring.
Avoid particular ingredients.
Avoid soapmaking during particular weather conditions.
Humidify the soap or the air around it while it's curing.
Use hot process. From what I've heard, HP soap doesn't get soda ash.
Use sodium lactate in your soap formulation.
Use beeswax in your soap formulation.
The problem is, unless you do a double test, using a particular prevention method on different bars from the same batch, you have no idea whether the absence of soda ash proves anything. It's like the joke about the man who snaps his fingers to keep elephants away—he's sure it works, because there aren't any elephants nearby.
And if you actually do find a method that seems to prevent soda ash, you'd have to repeat it over a number of tests before you could say it worked.
Plastic wrap has worked well enough for me that I still recommend it, though I know it doesn't always work. People who have problems with it may sometimes be under the impression that the wrap has to be applied the second the soap is poured. I've had just as much success when I've waited a few minutes until the surface is stable. I've had evidence that it works, in that I've sometimes gotten soda ash where there's a wrinkle in the wrap and nowhere else.
On the other hand, I've also gotten soda ash on soap that was well covered. And once, with a batch colored with annatto seed, I got it on all six faces of the bars—which certainly suggests a lot more going on than simple air contact.
Alcohol didn't prevent the soda ash deposit—it just left the top of the soap oddly marked by the drops of alcohol spray. Maybe I used too much. The results weren't good enough for me to try again.
I've never done a double test using a closed box or bag. But I have tried this method with many soaps, and it has been quite rare for the bars to get soda ash. However, since I didn't use the method scientifically—with a "control" that didn't receive the treatment—I don't know whether the enclosure was the reason for the absence of soda ash. And a few bars have gotten soda ash when treated this way—so it's not a magic bullet.
One way to keep soda ash from being a problem is to use a log mold and to trim any surfaces you don't like. Obviously, this doesn't prevent soda ash from forming—it just skirts the problem altogether.
My Two Cents
So you've got soda ash, regardless of any preventive measures you may have taken. Old advice was to rub the soap with alcohol—but although this removes the deposit, it also makes the soap look used, rendering it unsalable.
You can get surprisingly good results—at least with some soaps—by dunking the bar in water without rubbing it. This might not work for soaps with detailed patterns on the surface, though. I imagine they'd blur and look used.
I've gotten my best results with steam, and I've bought a clothing steamer for the purpose. It's quite surprising how little it takes. However, a friend says she got poor results with her steam iron, so it's still something of an open question.
Working around soda ash is a bit like trying to get through a maze blindfolded. I think it may have more than one cause, and more than one solution.