~ AROUND THE YEAR WITH COOKIE MOLDS ~
September
Quilting and Quilt Patterns
My Cookie Molds Books!


Contents
September on the Island
Fall Quilting
Recipe: Cookies for Quilters’ Tea
Mold: Hearts Quilt Pattern
Mold: Heart in Hand
Mold: Schoolhouse Quilt Pattern
Mold: Tulip Basket Quilt Pattern
Tip: Choosing a Recipe for Quilt Cookie Molds
Mold: Baltimore Album Wreath
Mold: Homespun Heart
Mold: Vase Motif
Mold: Tree Motif
Finale: A Whole Quilt!

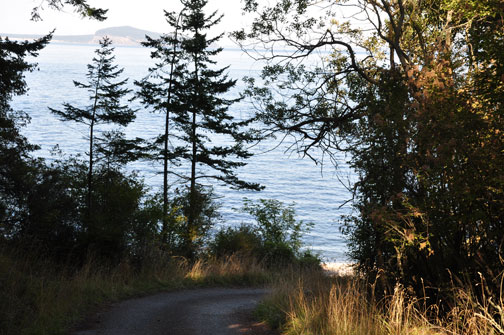
September on the Island
September brings big changes to San Juan Island. All summer, the island has been like a party, a vacation. We look around at unfamiliar faces, realizing that people work hard all year for the privilege of spending two weeks in a place we live in. We take the island less for granted now. True, it has its drawbacks—the isolation, the lack of choice. But it's a beautiful, safe, friendly place. We remember why we came here.
Slowly, like migrating birds, the visitors go home. Back to their schools, their jobs, their comparatively warm winters in the Southwest—or their colder ones in New York or Chicago. The afternoon light looks golden at this time of year. The days are still long, but we know winter is around the corner.
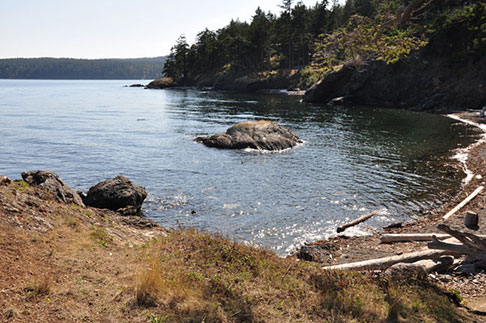
Still a few days to sit on the lawn with a view of the bay. Still a few excursions around the island, maybe a ferry trip to another island just for the fun of it. This is the time to wash quilts, or anything else that must dry in the sun, because it's our only reliable dry season. Soon the summer clothes will be packed away, the coats and boots will come out of hiding. We're on a steep hill, so the lightest snowfall can strand us if there's any ice on the road. We lay in winter supplies—canned goods, drinking water, milk in boxes. We are like squirrels—except that the island has no squirrels. When spring comes, we'll donate any of our unused hoard to the food bank.
We make sure our emergency lanterns are charged—Fall brings wild windstorms here. The power company is good about repairing outages, but you do need light in the interval.
Saying goodbye to summer and preparing for the coming cold and dark—that's September. But we love the island in all seasons, and feel a little sorry for our visitors, because they never get to see it on a wild winter night. They have their memories and their photographs of blue sea and flowers, but they haven't heard the wind rushing through the cedars like a freight train or seen a mist of frost, sparkling like dancing sugar, swirling above the road to the beach.
Fall Quilting
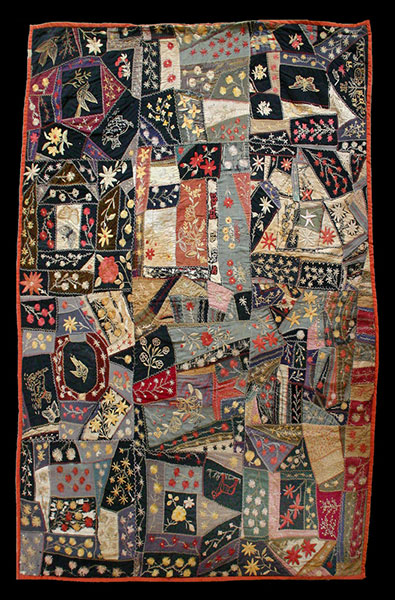
Victorian crazy quilt, folk art
Every season has its delights, and if you're a quilter, fall begins a time of planning and creating—quilts! Even on the island, summer days can be too hot for quilts in your lap, even if you use a frame to lift them. Fall brings new possibilities, and new reasons to make quilts.
Gifts, maybe for the holidays if you work quickly or your project is small. Keeping you or your loved ones warm in the cold, windy, island winters. Even just something to do when it's too cold to go out.
Recipe: Cookies for Quilters’ Tea
I've always enjoyed orange spice tea, so this cookie recipe is based on those flavors.
1 cup (225 grams) unsalted butter
1 large egg
1/2 cup (120 milliliters) honey
1 tablespoon freshly squeezed orange juice
1 teaspoon natural orange flavoring
1/2 teaspoon culinary orange oil
1/8 teaspoon natural lemon flavoring
1/2 cup (100 grams) sugar
1 teaspoon finely ground cinnamon
1/4 teaspoon ground cloves
1/8 teaspoon salt
About 4-1/2 cups (630 grams) all-purpose flour (plain flour)
1. Melt the butter and set aside.
2. Beat the egg in a large bowl until the yolk and white are fully mixed.
3. Mix the honey, orange juice, orange flavoring, orange oil, and lemon flavoring. Add to the egg and beat until well mixed.
4. Mix the sugar, cinnamon, cloves, and salt. Add to the egg mixture and beat until well mixed. If the mixture isn’t smooth, don’t worry—it will become smooth as you add the flour.
5. Add the melted butter slowly and beat until well mixed. Don’t just pour it in quickly—the heat still in the butter could cook the egg!
6. Add flour slowly and mix in until you have dough that is solid enough to knead.
7. Transfer the dough to a floured work surface. Continue adding flour by kneading in a little at a time until the dough is smooth and slightly sticky.
8. Wrap or cover the dough to prevent drying, then refrigerate to make it less sticky. This should take half an hour at most.
9. Roll and form the dough according to the directions for your cookie mold.
10. Refrigerate the cookies while you preheat the oven to 350°F (175°C).
11. Bake for 10 to 15 minutes or until the edges have slightly browned and the top has begun to firm up.
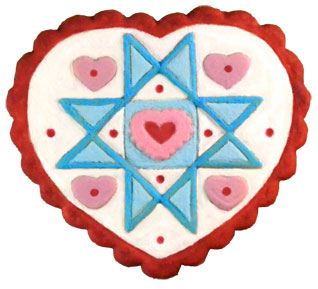
Mold: Hearts Quilt Pattern
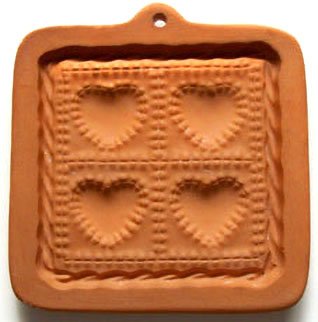
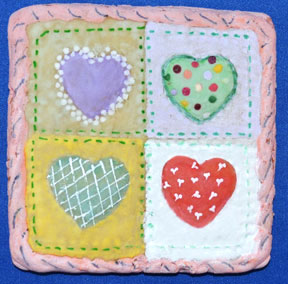
Cookie painting and quiltmaking—maybe they have more in common than we might think. Both are traditional women's arts, and both may be taken for granted. But they're both about love, I think—and maybe that's why hearts turn up so frequently in both quilts and cookies. This delightful design by Louise Sturdivant reminds me of quilted wall hangings, complete with fabric patterns!
There are many cookie molds in quilt patterns, and the cookies just beg to be decorated. You might not want to do something this special very often, but even a simpler decorating job will look charming.
Cotton Press made this mold.
Mold: Heart in Hand
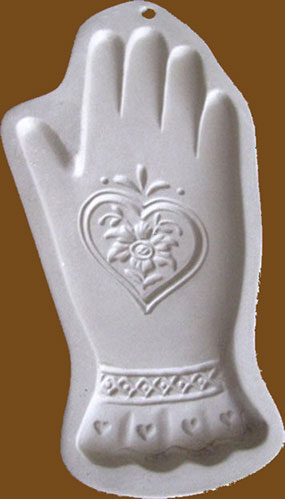
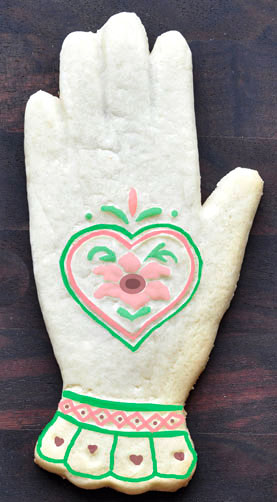
Here's the heart motif again, superimposed on a hand this time. This may have originally been a love token, but a similar motif was also used by the Shakers to mean "Hands to work, hearts to God."
I did the "painting" on this cookie, and, since painting is not one of my skills, it was done in the photo program on my computer. It does show what could be done, though.
Mold: Schoolhouse Quilt Pattern
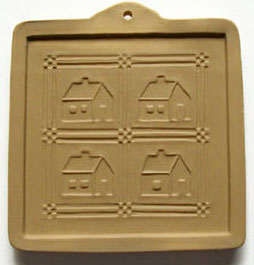
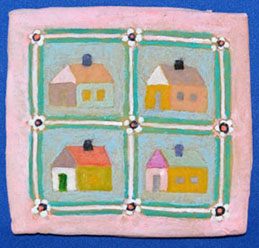
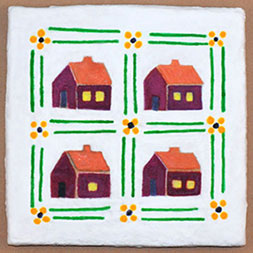
Another quilt wall hanging type cookie from Louise Sturdivant! Here we see the same mold with two different painting treatments. The flowers, bright colors, and azure background of the cookie on the left are like a colorful village on the seaside. The strong colors of the cookie on the right are perfect for the bright flowers she uses in the border.
This is a Brown Bag mold called Schoolhouse Quilt. It's actually for paper molding, which requires a much shallower mold. Without the painting, the cookie would not be nearly as effective. Like almost all Brown Bag molds, it's no longer available new. It isn't difficult to find a used one, though, and it shouldn't be expensive.
Mold: Tulip Basket Quilt Pattern
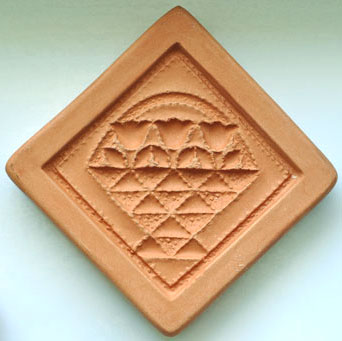
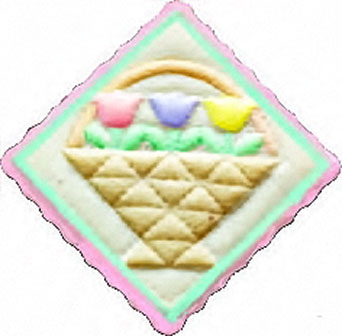
This one came from Cotton Press. I like the way the stitching is detailed in the mold itself.
Tip: Choosing a Recipe for Quilt Cookie Molds
Especially if you plan to paint the cookies, you'll want a light colored dough. It should also be very fine-textured, so you won't have lumps and bumps.
This is probably not the best use for layered cookies, because the lower-layer goodies can make the surface slightly irregular.
Some good choices from my book, Baking with Cookie Molds, would be Anne's Lemon Cookies, Apricot Jam Cookies, Danish Butter Cookies, and Perfection Springerle. The Apricot Jam Cookies would be particularly suitable for molds that are shallow or otherwise difficult, because that recipes prints and unmolds more easily than any other recipe I've tried.
Mold: Baltimore Album Wreath

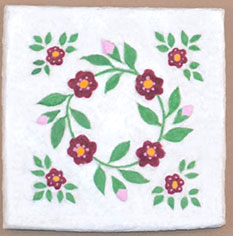
The Baltimore Album quilting style originated in Baltimore in the 19th Century. It's a distinctive style, sometimes very elaborate, and still popular with quilters today. You can find more information in an article from the Maryland Historical Society.
This cookie mold shows a very simple Baltimore Album block, and Louise Sturdivant has painted it in traditional colors. On the right, we see the stitching of the quilting lines, carefully picked out against the natural cookie color. And on the left, Louise has chosen a white background to duplicate the usual color of the Baltimore Album Quilts.
The mold was made by Cotton Press.
Mold: Homespun Heart
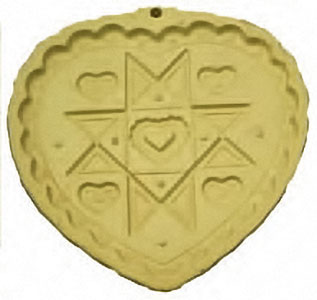
This mold was made by Pampered Chef, and is now out of production, but easy to find used, and inexpensive. I don't know of a quilt block with all these elements, but the star element is a traditional one called "Ohio Star."
Painting by Louise Sturdivant.
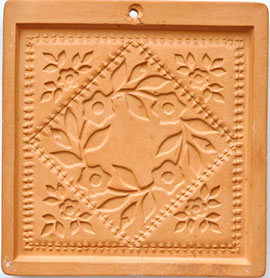
Mold: Vase Motif
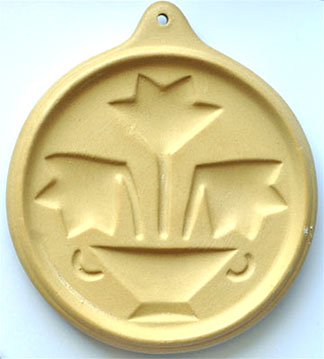
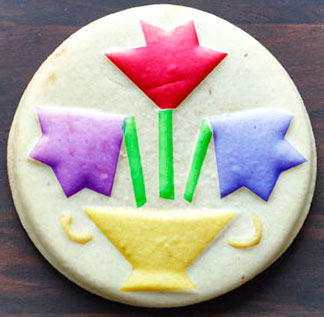
This is one of the Pfaltzgraff "America" series, no longer made but still easily available. It's a motif that's found in both decorative painting and appliquéd quilts.
Mold: Tree Motif
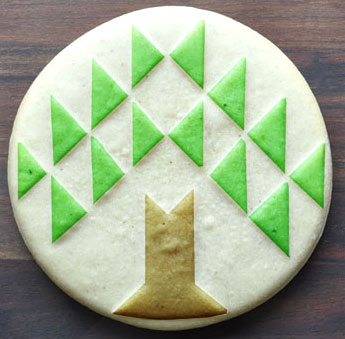
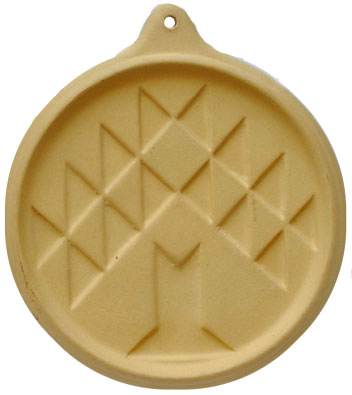
A quilter would probably call this pattern Pine Tree. This mold is another of the Pfaltzgraff "America" series.
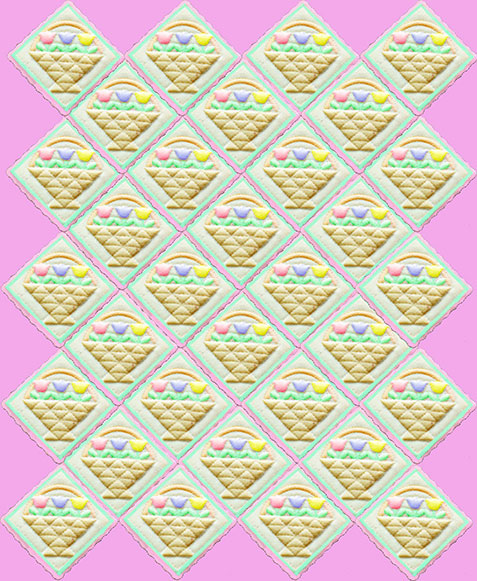
Finale: A Whole Quilt!
Imagine how cute it would look to arrange a tray of cookies to make a whole quilt! Here's one you might make for a baby shower, but the possibilities are endless! Tip: have the background color match the color of the cookie edge so minor irregularities will disappear.