~ HOUSEKEEPING AROUND THE YEAR ~
November
Kitchen Workspaces
Major Appliances
Kitchen Tips and Recipes
Easy Handcrafted Gifts
My Housekeeping Books!


Contents
Work Zones and the “Kitchen Triangle”
Countertop Housekeeping
Countertop Materials
Kitchen Tables
Portables
Sinks
Garbage Disposals and Garbage Cans
Major Kitchen Appliances—What to Look For
Kitchen Tips
A Few Recipes
Easy Handcrafted Gifts
Thoughts about Clutter—Countertop Clutter
The Mice Step Out!—Storytelling
Recommended Reading . . . and Not
Recommended Products . . . and Not
Credits
Work Zones and the “Kitchen Triangle”
The Kitchen Triangle is a set of design rules for kitchens. It's based on efficiency—placing the major appliances close enough to one another to minimize footsteps in meal preparation, but far enough apart for adequate countertop work space. It works very well in the situation it was designed for—fairly small kitchens where only one person is cooking.
Recently, with multiple cooks in many families, the idea of Work Zones has become more popular. So, a kitchen will have a Cooking Zone, a Washing Zone, and a Storage Zone, or those may be further broken down into sub-zones like Baking, Kids' Zone, etc. Of course, much of this would only apply if you're building or remodeling a kitchen, which goes well beyond housekeeping.
Still, the way you use an existing kitchen can add or subtract a lot of order and convenience. I think most of us tend to organize our kitchens for efficiency as much as possible. It's fairly obvious that, if you have the cabinet space, the canned beans and tomato sauce are going to be kept separate from the flour, sugar, and baking powder. Pots are near the stove, knives and cutting boards aren't across the room from each other, and so forth.
If your kitchen is disorganized and tiring to work in, give some thought to efficiency. Think of the tasks you do frequently, and whether they involve wasted energy because of the way things are arranged. This is one place where it may be smart to have a few duplicates, no matter what household advice books say.
For example, I have three pairs of scissors in my kitchen—one on a magnetic hook on the side of the refrigerator, mostly used for opening food packages; one near the cutting boards, used for chopping herbs and other foods; and one in a drawer beneath the counter "peninsula" where I open packages that come in the mail. Having scissors handy in each of three places where they're needed saves me walking across the kitchen for many everyday tasks.
Countertop Housekeeping
I've read opinions to the effect that countertops have more germs than the toilet seat. I won't believe that until the researchers start doing food preparation on their toilet seats.
More than one study has concluded that excessive cleanliness and sterilization cause more problems than they solve. On the other hand, countertop cleaning is something to take seriously, particularly if your food preparation includes raw meat and fish. Even vegetables can have harmful bacteria. So, a middle way seems best: Don't try to sterilize everything, but clean your countertops frequently and thoroughly, and always clean them before preparing food that will be eaten raw. Also, clean and disinfect sponges, dishcloths, and cutting boards frequently. Just don't think you have to autoclave everything.
Keep countertops as uncluttered as possible to make cleaning easier. Keeping them completely bare may not be practical, though. It may be necessary to keep frequently used or very heavy small appliances like large food processors or stand mixers on the countertops. You probably won't use them at all, if they're a pain to drag out of a cabinet. If you do put them on counters, put them in an inconvenient corner with a flexible cutting mat underneath them. That way, you can drag the appliance into a convenient position when you need it without scratching the countertop. Wind up the cord and secure it with a Velcro tie when the appliance isn't in use.
If you have a glass-topped stove, don't be afraid to use the stovetop as part of your countertop when it's not hot. You can put hot things directly on it, but be careful not to drag things across a glass stovetop—they scratch easily.
If you have a regular stove, you can get a cover that will convert a (cold) stovetop to countertop space. I had one of these and found it useful, but the problem was where to store such a large object when it wasn't in use.
Countertop Materials
Plastic Laminate
This is loosely referred to as Formica, the original trade name. It varies in quality depending on maker and, to a large extent, price. Disadvantages are a lack of heat resistance in many brands and a tendency to scratch, chip, and lose any shine it started with.
Advantages are easy cleaning, low cost, and a slightly resilient surface—if you overturn a glass on a plastic countertop, the glass may not break. On harder materials like tile, it probably will.
For cleaning, you can use any general purpose cleaner, vinegar, baking soda paste, plain water, soap and water. Probably the easiest to clean of all countertop surfaces. Stains can be removed with bleach—straight, diluted, paste of cleanser, or straight liquid dishwasher detergent.
Ceramic Tile
Tiles themselves are usually very low-maintenance. The grout is the problem—it stains, collects dirt, and eventually begins to crumble. Regrouting is possible, but a major effort. Anything dropped on a ceramic tile counter is probably going to break.
For everyday cleaning, soap and water or a general purpose cleaner will do a good job. Some recommend baking soda paste for cleaning tile. Special tile and grout cleaners are available for occasional deep cleaning. If you use a product of this kind, follow the manufacturer's instructions.
Corian
Corian is a trade name for a solid countertop material made of minerals and binding resin. It is somewhat heat resistant, but should not be exposed to extreme heat. Use hot pads or trivets between the counter and hot cookware or heat-generating small appliances. Avoid contact with strong chemicals. Some people have commented that older Corian is hard to clean, and easily stained.
Most household cleaners work well on it. However, the manufacturer says not to use window cleaner. Stains and blotches may be removable with mild abrasive cleanser. Follow manufacturer's detailed instructions for damage repair.
Stone
Stone countertop materials include granite, margle, soapstone, slate, travertine, and quartz. All of them, like tile, are hard surfaces that may chip or break fragile items that overturn or drop. While different stone materials vary, many rely on sealants to keep them from staining—when the sealant wears off, they must be professionally re-sealed, or even water will mark them.
Some types of stone countertops require special cleaners. Some need to be polished at regular intervals. Follow manufacturer's instructions if available. If not, search online on "maintain granite countertop" (or whichever material you have). Compare the various sources you find and follow whatever advice seems to be a consensus.
Stainless Steel
Stainless steel is the material used in restaurant countertops. It's easy to maintain, although it may scratch or streak. You don't have to worry about hot pots and pans, which is a big plus. It's comparatively expensive to install.
I've found that white vinegar does a fine, streak-free job on stainless steel. You can also use soap and water or general-purpose cleaner. You can go to the trouble of buffing and shining if you want, but it's not necessary. Why should a countertop shine?
Wood
Wood countertops may be edge grain, end grain, or plank, and that affects how you treat them. True end grain looks like small blocks, and you see no running wood grain because you're looking at it vertically. Edge grain or plank would show typical wood grain.
Follow manufacturer's cleaning recommendations, if they're available. Or treat basically as any wood tabletop—keep the surface clean and dry, and reapply sealer as needed.
Concrete
Concrete is similar to tile in many ways, but it is all one piece, so the problem of grout maintenance is avoided. It's porous and must be sealed to avoid staining, and the sealer has to be renewed. Like tile, it's inclined to break or chip fragile objects. It's much more heat resistant than most materials. The edges can chip.
Clean with soap and water, or with special products made just for use with concrete. Don't use abrasive pads or other tools that could scratch the surface.
Glass
Glass countertops are actually recycled glass in a cement or resin binder. The cement binder is more expensive, and probably more durable. Some manufacturers advise cleaning with mild cleaners and say it's important to clean up spills quickly to prevent staining.
Clean with soap and water or mild cleaner.
Kitchen Tables
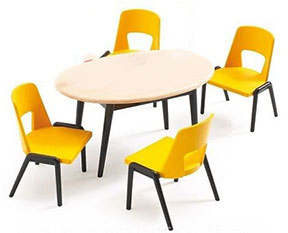
We all have our dreams, I suppose. And a kitchen table is probably an odd thing to have strong feelings about. But of all the things I would like to have in a house, and rarely have had, a kitchen with room for a table is probably the top.
It's the right height of work surface for rolling piecrust or kneading dough, or quite a few other tasks that are more easily done from a height above the work rather than beside it. For someone of my height, anyway, and I'm an average-height woman.
It's also where people sit and talk, share stories and coffee, keep the cook company, and enjoy casual living in a friendly home.
If you have a chance to put an eating area in your kitchen, try it. Countertops are great. But I miss kitchen tables.
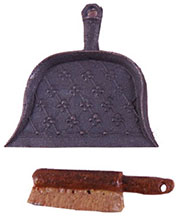
Keep a brush and small dustpan handy for removing dry materials like flour from countertops and tables. It's much easier than wet-cleaning, because you're not adding to the mess by dampening it. I have a second brush-and-dustpan set that I use on the floor, but the counter one is saved for only counter and table use.
Portables
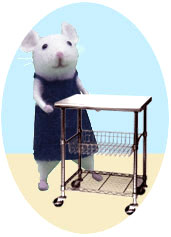
If your counter space is limited, but you have some floor space, a kitchen cart may be the answer. Another possibility is a rolling tool cabinet of the kind that mechanics use, with a cutting board applied to the top.
Even a foldable serving cart can add to countertop space as needed. Some are so compact when folded that they could be stored alongside your refrigerator or in other small spaces in the kitchen.
The top of a portable dishwasher would also serve as additional counter space.
Sinks
At least one housekeeping book makes a point of the need to begin by polishing your sink. Wouldn't work for me. If I started cleaning by polishing the sink, that's as far as I'd get. Sinks are there to be messed up as you clean everything else. How can you clean, if you're dealing with a polished sink? You might as well polish the mop head.
There are more kinds of kitchen sinks than anyone could count. Many different materials, colors, mountings, sizes, and shapes. Faucet types. Sprayer, no sprayer. As far as all that goes, most of us are stuck with what we have. Assuming that you're not remodeling your home—which would go far beyond housekeeping—the main thing you need to know is how to clean the sink.
For that chore, I'd use cleanser, unless the material was one that needed special treatment. If the faucets or mounting have crevices that are hard to clean, a small, stiff brush or a battery powered scrub brush can be very helpful.
Some sources recommend pouring boiling water down the sink drain to wash grease and dirt away. This is probably not the best idea, as it can damage porcelain sinks and some kinds of pipe. Instead, I flush the drain with ordinary hot water and dish soap from time to time.
If the drain of a double sink becomes clogged, and you use a plunger to unclog it, block the other side with a stopper or pot lid—either a regular lid from one of your pots, or a silicone "fits all" lid. A plunger won't develop enough pressure if the opposite side of the sink is not blocked.
Garbage Disposals and Garbage Cans
If you have a garbage disposal, make sure you know how to unclog it. There is usually a key, fastened somehow to the lower part of the unit.
Don't put grease, eggshells, rice, potatoes, beans, fibrous foods, raw chicken skin, onion peels, coffee grounds, fruit pits or seeds, apple cores, or bones down a garbage disposal.
Maybe it would be better not to use it? I thought that, but it developed nasty odors. Many people clean them with ice and salt, or vinegar and baking soda. I use hot water and dishwashing liquid. However, when you are using the appliance to grind garbage, always use cold water, so the fats will get disposed of properly.
For kitchen disposal containers, I keep food garbage separate from trash. The food garbage goes in a small, heavy can with a tight lid. I take that to the outside can every day.
In very hot weather, I keep a bag of vegetable peelings, fruit peels, and similar things in the freezer. I put the frozen food waste out in the outdoor can on garbage pickup day. This saves having extreme odors from food waste, but it's important to remember to take that bag out of the freezer!
Trash would be things like food wrappers and rinsed-out cans. These won't smell up the house, so they can be collected in a larger can and disposed of only when the can is full.
You could have another container for recycling. Find out what is acceptable for recycling in your area, because it varies.
When I'm cooking, I use a bowl on the counter to collect trimmings and other garbage. This saves a lot of steps back and forth to the garbage can as I'm working at the counter. If your garbage can is in a handy location, doing this might not be as helpful as it is in my kitchen.
Major Kitchen Appliances—What to Look For
New appliances are a major purchase on most people's budgets. However, if you have an old refrigerator, you may actually save money by replacing it, as the efficiency of new models results in lower electricity costs. In the long run, a new refrigerator may pay for itself. The same would be true of freezers, of course.
Still, it's a fair amount of money to shell out at once. Consumer advocates have general hints for considering and comparing new appliances:
Ask around. What do your friends think about recent purchases of their own?
Review the Energy Guide label. How does the utility cost of this appliance compare to similar ones?
Make sure the electrical circuit you plan to use has adequate capacity for this appliance.
Read consumer magazine articles.
Make a list of features you'd use, and compare models.
Be realistic about your needs. Interesting features aren't always things that would really make a difference to you.
Read the owner's manual and the warranty.
Make sure you can get it into the room and that it fits the space you have—vertical as well as horizontal.
If the appliance has a door, make sure clearances would permit the door to open.
Make sure service for it is available in your area.
Stoves and Ovens
I've had various kinds of cooktops and ovens—gas, propane, and electric. Gas and propane were by far the best for burners. I prefer electric power for an oven.
Consider the frequency of electrical outages in your area, and how long they typically last.
Ordinary electric cooktops aren't the best—they are slow to change temperature level. I've gotten around that by changing burners if I want a different temperature, especially if I need to turn the heat down. Or it's possible to reduce the heat by lifting the pan a little.
I'm not a fan of glass cooktops, although they have improved since they came on the market. The newer ones perform about as well as any other electric cooktop, but they have to be cleaned with special cleaners, and they scratch easily. A boilover is a serious problem unless it's cleaned up as soon as the unit cools. The cooktop cools slowly—you have to be careful around it long after you're done cooking. And it wastes power, even compared to traditional electric burners.
When you're thinking about replacing an oven, think about whether the size works with pots and pans you have. You probably don't want to have to replace your bakeware for your new oven.
Refrigerators and Freezers
Does the door open in the direction that works with your kitchen plan? If not, it may be reversible.
Does the interior layout work for you? How adjustable is it?
Dishwashers
Dishwashers are available in full size and compact. Both have their advantages—depends on what you need.
Check the options for cycle selections. A light wash cycle option may save energy and money if that's what you mostly need.
Some dishwashers have a sanitizing feature. I don't feel the need for it, but if your household includes a person with health issues, or if you're bottling food or toiletries, especially for sale, it might be worth your while to have the sterilization feature.
Check the system for distributing water. There are different ways of getting water to all the dishes, and they may limit what can be washed.
A portable dishwasher has big disadvantages as well as its obvious advantages. It uses a great deal of floor space and monopolizes the sink when it's running.
You shouldn't wash crystal, gold-trimmed plates, good knives, hollowware, aluminum, cast iron, some nonstick pots and pans, wooden items, or cans with glued-on labels in a dishwasher. Many plastics are only washable in the top rack. Don't wash stainless steel and sterling silver together.
Dishwashers do have their share of disadvantages. Still, the pluses may outweigh the minuses for you.
Kitchen Tips
General
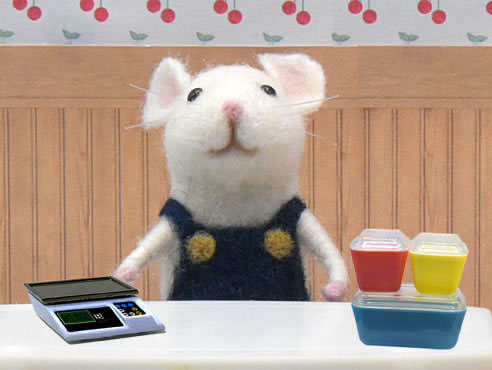
It's easier to weigh many ingredients than it is to measure them. If you have a scale, you can work out the weight of a given volume from the nutrition information. (Then make a note in your cookbook). With some things—brown sugar is a prime example—weighing is much easier. Many accurate, inexpensive scales are available. Weighing in grams is more accurate than weighing in ounces, so even if you live in a country that doesn't use the metric system, you might decide to set your scale to grams—it's easy to get used to.
I weigh or measure all ingredients into small bowls and have them ready before I start mixing. This is what restaurants call mise en place. It does use more dishes, but you avoid a lot of mistakes.
Disposable/reusable food storage containers like GladWare come in a bewildering array of sizes and shapes. Limit yourself to two or three, or you'll have a storage problem. I store the lids in zip bags and stack the containers themselves. They take up much less space that way.
Whenever possible, I use parchment paper instead of greasing pans.
Substitute broth for water in soup and similar recipes to get better flavor.
If a baking recipe calls for whole eggs, bring them to room temperature. But don't try to separate yolks from whites at room temperature—it's much harder than if they're cold.
Keep a grocery list pad and pen handy, and add to it as you use things up or notice that they're getting low.
Use unwaxed dental floss for slicing foods that are too soft to slice well with a knife. When you make cinnamon rolls, slice the roll by "lasso-ing" the rolled-up dough with dental floss, and then bringing the ends up and together.
Buy good knives and treat them like the fine possessions they are. Protect the edges from damage by using sheaths, or keep them in a knife block or on a magnetic strip. Hand wash them but do not ever submerge the whole knife in a dishpan—you could cut yourself badly. Either have your knives professionally sharpened or get a high-end knife sharpener—cheap ones will ruin your knives. One exception to all this: Buy one or two cheap knives, so that when you need to use a knife for something that's likely to damage it, you won't be tempted to use one of the good ones.
Fruit
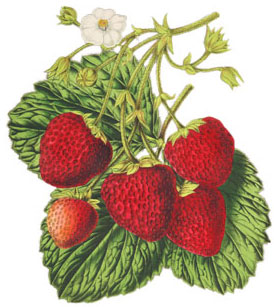
Lay berries in a tray one berry deep and refrigerate. The less they touch each other, the less chance of spoilage, or of spoilage spreading if one does go bad. Don't cover. Don't wash until you're ready to eat them.
To get the best taste from a fresh pineapple, turn it upside down for a day. This makes the sweet juice run back toward the top of the pineapple. The easiest way I've found to prop a pineapple up is to put it in the jar of a countertop blender. The base is heavy enough to keep the pineapple from falling over.
If you're using lemon peel in a recipe with sugar, mix the peel and sugar and rub them together before combining with the other ingredients. Brings out the fragrant oil in the peel.
Cut an apple in half and remove the center of the core with a melon baller. Wastes much less than trimming with a knife.
I sometimes buy bananas at different stages of ripeness, separating them from their bunches in the market—a couple of ripe or nearly-ripe, and a few more that show some green. If you wrap the stems tightly in plastic wrap, they last longer. Also, if you can, keep them in a bowl or basket that's at least a little open, to get good ventilation around the whole bunch.
Herbs
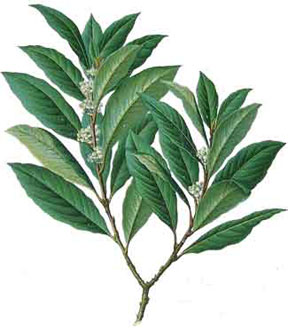
Fill a mason jar partway with water and put herb stems into it like a bouquet, first removing any rubber bands or ties. Also remove any leaves that would be beneath the water level. Cover loosely with a plastic food storage bag. I put the herb jar on the shelf on the refrigerator door in a washed cut-off milk carton—that keeps it from overturning.
Nuts
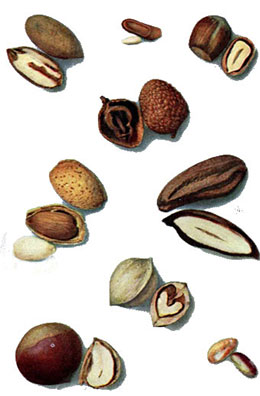
Most nuts taste better toasted. I usually toast them whether the recipe directs me to or not.
To grind nuts for baking, mix with part of the flour and process in a food processor. Without the flour, you get nut butter.
Spices and Extracts

Spice dealers are a far better source than the grocery store. For one thing, the spices are fresher and taste much better. For another, even with postage, you may save money, because you don't have to keep buying little jars. They contribute a great deal to the price of packaged spices. And bulk grocery store spices are usually mediocre brands, and often stale as well.
Freeze fresh ginger root. It's much easier to grate if you do, much less fibrous, and of course, it won't go bad. I substitute fresh ginger for powdered in almost every recipe that calls for the dried version.
Different types of vanilla extract are available, so taste-test and see what you like. My favorite, Tahitian, is avoided by some because it contains sugar. Everything I put vanilla extract in contains a lot more sugar, so that doesn't bother me. Avoid artificial vanilla extract—it tastes nothing like the real thing. In general, natural extracts are always the way to go.
Culinary citrus oils can substitute for citrus peel. This is a strong flavor, so use carefully.
Leftovers
Freeze leftover onions, carrots, celery, and tomatoes for making soup or pizza sauce.
Freeze leftover broth for soup making.
Puree fresh herbs in the food processor or blender with water or broth, and freeze them in ice cube trays. Move to labeled plastic bags once they're frozen. Use in soup, homemade pasta sauce, and casseroles.
If you can, buy lemons or limes in large bags at restaurant supply stores—they are much cheaper. Grate the peel and juice them. Freeze the juice in ice cube trays—you can remove the frozen cubes, wrap them individually in plastic wrap, and store them compactly in plastic bags in the freezer. Freeze the peel in a labeled zip bag.
Freeze leftover tomato sauce, tomato paste, or canned tomatoes in ice cube trays, too. I used to buy tomato paste in tubes, rationalizing the price by the waste-free advantage of tubes over cans. Then it occurred to me to freeze the leftovers from cans, so I get the advantage of both.
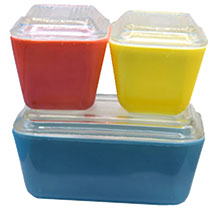
If you don't like storing food in plastic bags and GladWare dishes, glass containers like the ones on the left are available, with either plastic or glass tops.
A Few Recipes
Here are a few favorite recipes, either of my own creation or shared by permission.
Anne’s Carrot Cake
4 large eggs
1 cup white sugar
1/2 cup brown sugar
2 teaspoons Ceylon cinnamon
Pinch cloves
Pinch allspice
1-1/2 teaspoons freshly grated nutmeg
1 teaspoon salt
1-1/2 teaspoons baking soda
1 tablespoon baking powder
2 cups flour
1 teaspoon vanilla extract
1-1/2 cups vegetable oil
2-1/4 cups finely shredded carrots
3/4 cups canned crushed pineapple, drained overnight if possible
1 cup toasted walnuts
1/2 cup raisins
1/2 cup golden raisins
1. Preheat oven to 350°F. Grease and flour two 8-inch layer cake pans. Put parchment paper in bottoms.
2. Toast nuts and cool.
3. In a large mixing bowl, combine eggs and sugar, mixing well. Add spices, salt, baking soda, baking powder, and vanilla. Mix well. Add oil, then flour, one cup at a time. Stir in the carrots, pineapple, raisins, and nuts.
4. Bake about half an hour or until done. Cool for 20 minutes, then unmold onto cake rack to cool completely.
Frosting
4 tablespoons butter
8 ounces cream cheese
2 teaspoons vanilla
1 teaspoon finely grated orange rind
1 teaspoon finely grated lemon rind
3-1/2 cups (or more) sifted powdered sugar.
1. Soften butter and cream cheese. Whip together.
2. Add vanilla and grated orange and lemon rinds. Beat until smooth.
3. Gradually add sifted powdered sugar to the desired consistency.
Louisiana Gumbo
This recipe courtesy of my late stepmother, whose cooking will be remembered for a couple of generations.
Use about 1-1/2 quarts of broth in this recipe. Broth is turkey broth according to the recipe. I've made it with a mixture of chicken or vegetable broth and bottled clam juice.
1. With 6 level tablespoons of flour and just enough oil to moisten it well, make a roux by browning this slowly to a dark, rich brown. Add a little oil, if needed to stir easily. This must be stirred constantly to get it very brown without burning.
2. Add three large onions, chopped, and about 2 cups chopped green onions, including the tops. Cook these in the roux for several minutes, stirring. Add some broth and 2 to 3 cups chopped celery, 3/4 cup chopped parsley, and three bay leaves. Cook for a few minutes.
3. Add remaining broth, 3/4 to 1 can tomato paste, two whole cloves, and Worcestershire sauce, Tabasco, salt, and pepper to taste. If using crab claws or other crab in the shell, these get added now.
4. Simmer for about one hour. If you are adding shrimp, add them in the last ten minutes of cooking. (Shell and de-vein the shrimp first). Shelled crabmeat would go in at this time, too. Oysters are added at the last minute.
5. Pour over rice in bowls and sprinkle with gumbo filé.
Brookfield Fruitcake
People who hate fruitcake love this one! This is one fruitcake that won't end up as clutter. Of course, people who like fruitcake love it too. It has no candied fruit, and no citron.
1. Prepare by heavily greasing five or six of the small fruitcake loaf pans, or a tube pan (not bundt), or a couple of bread loaf pans—this recipe isn’t particular. Preheat the oven to 300°F.
2. Mix together just under a pound and a half of pitted, cut-up dates and two pounds of your favorite DRIED fruit. Apples, cherries, pineapple, berries, pears, apricots, or peaches are fine. Use the ones you like.
3. Combine 2 cups sifted all-purpose flour with 2 teaspoons of baking powder and 1/2 teaspoon of salt. Sift it all over the fruit and dates, and mix the whole thing up well with your fingers. You need a large mixing bowl. Distribute the flour coating evenly so the fruit pieces don’t stick together.
4. Beat together four eggs and 1 cup granulated white sugar until blended. Add this to the fruit mixture and mix well with a large spoon.
5. Add 2 pounds of your favorite unsalted nuts. Hazelnuts, pecans, almonds, or whatever you like best.
6. Mix some more. There will be very little batter in proportion to the fruit and nuts. It’s just enough to stick them together.
7. Pack into pans and bake until the tops look dry. This takes a while. Keep checking it.
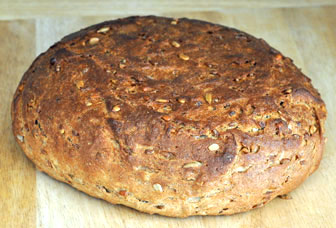
Anne’s Health Bread
First you make a sponge, about the consistency of pancake batter. After that has risen once, you add more flour and other ingredients. This recipe calls for a lot of yeast, but it needs it!
Sponge
2 cups milk
1-1/2 tablespoons dry yeast
1/3 cup honey
1 cup barley flour
1 cup whole wheat flour
1 cup unbleached bread flour
1. Scald the milk. Add the honey and let the mixture cool to 110°F.
2. Sprinkle the yeast on top and let it soften for a few minutes. Then stir in all three kinds of flour and either beat one hundred strokes with a large spoon or use an electric mixer on medium speed for about a minute.
3. Let rise in a warm place until doubled in bulk—maybe three-quarters hour at 90°F.
Dough
1 cup cooked wheat berries
1/2 cup chopped toasted walnuts
1/2 cup roasted unsalted sunflower seeds (hulled)
2 tablespoons melted butter
2 teaspoons salt
About 1 cup whole wheat flour
About 1 cup unbleached bread flour
1. Add all the dough ingredients to the sponge.
2. Knead, adding more flour as needed in about a 50/50 ratio of whole wheat and unbleached bread flour, until the dough is smooth and elastic. (The chunks of stuff won’t make for a smooth ball of dough, but the dough itself should be smooth.)
3. Let rise until doubled, about half an hour. Deflate and let rise until doubled again.
Loaf
1. Shape into a loaf. Let rise about half an hour.
2. Bake at 400°F to an internal temperature of 200°F.
Easy Handcrafted Gifts
November is a good time to start planning for handcrafted gifts for the holidays. Handmade gifts are appreciated, and they usually are less expensive and more personal than anything you'd find in a store.
Some handcrafted items would require study, practice, and special flair, but others are quite easy to make. The ones listed below are appropriate for making by either children or adults.
Note: I have no connection of any kind with any of the products or companies I recommend. Nor do I profit or get a commission if you use my links.
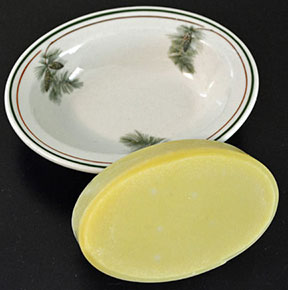
Glycerin Soap, Lotions, and other Toiletries
Also known as "melt-and-pour soap." Do NOT buy melt-and-pour soap base from a craft store—the kind they sell is awful. It lathers about as much as the average rock.
Good melt-and-pour soap base has only one major drawback, which is that in humid weather, it can develop beads of moisture. This problem is almost completely eliminated by buying "low sweat" soap base. You can get it in either clear or white, and can color it with inexpensive soap colorants. Use either essential oil or fragrance oil for scent, but don't buy the tiny bottles of fragrance oil you find in markets and health food stores. Instead, buy from a soap supply vendor who's located close to you. That saves postage.
For easy, instant gifts, shop soap supply vendors for bases for lotions and other toiletries that can be colored, scented, and packaged as you like.
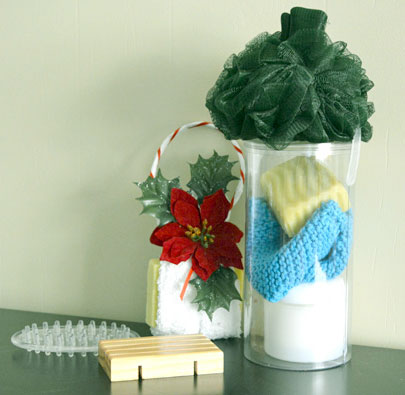
You can combine your soaps with pretty soap dishes or wrap them in small cellophane bags and collect them in a pretty basket or transparent box with other toiletries. Or make shaving soap in mugs, if there are people on your list who'd like that.
Recommended
SFIC LCP Melt And Pour Soap. Available from numerous vendors.
Kits for all kinds of toiletries from Bramble Berry. Other vendors sell kits as well.
My Soapmaking Page includes an extensive list of soap supply vendors.
Melt & Pour Soapmaking, by Marie Browning. Many ideas and excellent instructions.
Beeswax Candles
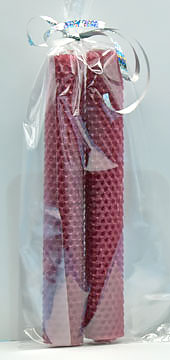
Rolled beeswax candles make very attractive gifts, and this is such an easy project, you can do it with kids. You can get the kits in many different colors.
Recommended
Toadily Handmade rolled candle making kit.
Mix in a Jar
You could make baking mixes using your favorite recipes. Adapt as needed—for example, use dry milk instead of fluid milk so that all the recipient has to do is add water. Of course, test your modified recipe yourself first!
Wide mouth mason jars are easier to work with than standard ones. You'll probably be using the large, quart or liter, jars. I prefer the plastic tops to the two-piece metal ones.
The way most jar mix recipes are written, the only things that go into the mix are dry ingredients and additions like nuts, chocolate chips, and oatmeal. Liquids and butter are added when the mix is used.
So, first figure out the volume of the dry ingredients—cups of flour, plus cups of sugar, plus cups of additions. If you're using large mason jars, they hold four cups. So one recipe may make more than one jar full.
If a recipe contains brown sugar, you can use one or more layers of this ingredient as a kind of seal to keep your various other layers from mixing. Tamp brown sugar down tightly to seal the ingredients below it.
1. Sift the flour, baking powder and/or baking soda, and any spices together and set aside. If you're using dry milk, powdered vanilla, cocoa, or other dry ingredients, sift with the flour.
2. Measure sugar and set aside.
3. Measure any additions separately and set aside.
4. Using a mason jar funnel, put the flour mixture in first.
5. Add sugar and/or brown sugar, tamping ingredients down well.
6. Additions like nuts and chocolate chips go on top.
Don't forget to include a card with instructions. Instructions should give quantities of butter, eggs, and liquids, instructions for mixing, and instructions for baking.
There are books with special recipes for jar mixes, including suggestions for decorating.
Recommended
Gifts in Jars, by Kristina Newman. Recipes for cookie, cake, brownie, soup, breakfast items, beverage mixes, and toiletries.
Bead Necklace or Bracelet

Making jewelry with beads is quite easy. Here are some helpful ideas:
Bead stores have a huge variety, and so do some craft stores. One helpful, inexpensive tool is a bead board, which lets you lay out your design before you string it.
Use beading thread or wire rather than regular thread or dental floss.
One very helpful tool is a spring clamp that you put at one end of the string to keep the beads from sliding off.
Focal beads or pendants can made a string of beads even more special.
"Findings" like clasps and jump rings are inexpensive and easy to use. All you really need is needle-nose pliers with a gripping surface.
Typical necklace lengths for women:
10-14 inches—Fits closely around the neck.
16 inches—Fits loosely around the neck.
18 inches—Sits at collarbone level.
20 inches—Just below the collarbone.
22 inches—Centers at or above top of bust.
24 inches—At center of bust.
28-38 inches—Hangs below bust.
40 inches plus—Hangs below the waist.
Bracelet and Necklace Blanks

In the photo above, the necklace at the top is made from cabochon blanks linked together, finished with buttons glued to the blanks. The cord and clasps were added.
At the bottom is a bracelet blank. This could be finished with buttons, stones, charms, crystals, or whatever you like. The clasp and safety chain are included with the blank.
Assembly is with jeweler's glue or crazy glue (be sure to use good ventilation with either).
Blanks of all kinds for bracelets, necklaces, and pendants are inexpensive and easy to find online. Etsy is one very good source.
Packaging for Gifts
For jewelry, most craft stores sell a variety of small boxes for your finished necklaces and bracelets, including cotton padding. Many online sources are available as well.
Soaps can be packaged with soap dishes, scrubbies, lotions, hand knit washcloths, or any other toiletries or accessories that strike your fancy. Package in baskets or boxes. I recommend using cellophane bags or shrink wrap if you use colored packing shred or tissue paper with soaps—the color can leach onto them.
For lotions and other toiletries, you can get empty bottles of all kinds. Sterilize the bottles before filling them. One easy way to fill lotion bottles is from the kind of squeeze bottles that are used for ketchup or hair coloring products. Works better than a funnel.
At many craft stores, you can buy clear cellophane "treat bags" to fit candles, soaps, and other small gifts. Also, shrink wrap that will give baskets of goodies a professional look.
Recommended
Clear Bags—Not just bags, but all kinds of boxes and containers for gift packaging.
Thoughts about Clutter—Countertop Clutter
Clutter on countertops is hard to avoid, but it's important to make the effort. Unless you have almost unlimited counter space—and who ever heard of that?—it's a good idea to think carefully about what you're going to keep on your countertops. Every object that sits on a counter permanently makes that counter a little harder to use and clean.
If your space is very limited, you may choose to keep nothing at all on the countertops. One way to avoid countertop storage is to use hooks, hanging rails, hanging baskets, wall shelves, and similar organizers to move tools like spoons and whisks to the wall space above the counters. Look at designs and products for camper kitchens and boat galleys—they are ingenious and efficient.
Think about what's traditionally on kitchen counters in homes. I have very little kitchen counter space, so I pared things down as much as I could.
Canister sets. Typically Flour, Sugar, Coffee, and Tea, in graduated sizes. I decided I didn't need to have flour, sugar, or tea any more handy than anything else. Instead of flour and sugar canisters, I have large plastic jars with screw-on caps, which are better for keeping ants out of the food in any case. Rather than put them on the counter, I added them to the other baking staples in my pantry. I do have a coffee canister on the counter, next to the coffee maker.
Spice rack. I put my spice jars in the refrigerator in a slide-out box. The spices last longer, that way.
Knife block. I found a knife rack that mounts on the inside of a lower cabinet door. Not recommended if there are small children in the house, but you can also get knife trays that drop down from the bottom of the upper cabinet.
Dish drainer. I moved the drainer and its tray to the lower shelf of the kitchen cart I described above. I do have a very small dish drainer on the counter in a narrow strip between the cooktop and the wall. Nothing else fit there, and it's moderately handy.
Tool crock. Instead of a crock or carousel on the counter, I hung some kitchen tools on the wall, some on a rail that I made from a tension shower curtain rod and S-hooks from a dollar store. A few of my tools weren't made to hang, so I put up a wall basket for them. I found some small wall-mounted bins for bag ties and similar items.
Fruit bowl. I moved this to the dining room.
Paper towel holder. I mounted a magnetic one to the side of my refrigerator.
Cutting board. Instead of a heavy wood cutting board, I hung two silicone cutting boards on the side of a cabinet.
Microwave oven. I moved it to the top of the refrigerator. This isn't ideal, but it's workable. A magnetic hook on the side of the refrigerator keeps a couple of pot holders handy.
So what's left on my counter?
Small dish drainer. As mentioned above. Behind it is a small tray with a salt shaker, salt cellar, peppermill, and knife sharpener. In another kitchen those items might not be on the counter, but it's a narrow, otherwise unusable space between the cooktop and the wall.
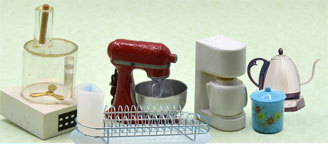
Stand mixer. Too awkward to drag in and out of a cabinet. I keep it on a flexible cutting board, and pull it out from its corner when I need it.
Food processor. Too heavy and too frequently used to put away, so it also is stashed in a corner of the counter. It's not too heavy to lift enough to reposition it, so I do that. I keep the most frequently used accessory, the steel blade, mounted in the bowl, but the slicing and shredding discs are stored within easy reach.
Coffee maker and coffee canister. These are in a corner next to the refrigerator. I put a magnetic hook on the side of the refrigerator to hold my coffee scoop and a magnetic basket for filters.
Electric kettle. This is a concession to having an all-electric kitchen, which I dislike. It's much more convenient and economical to use small appliances for most tasks. But I wouldn't have it, if I had a gas or propane stove.
Your list of what you want and need to keep handy will probably be different from mine. But give it some thought, if your kitchen is small or counter space is limited.
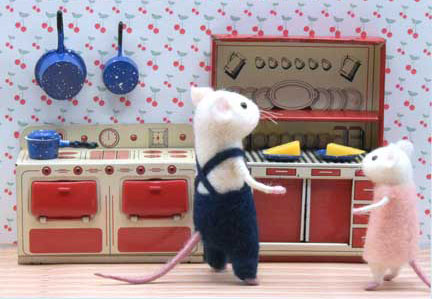
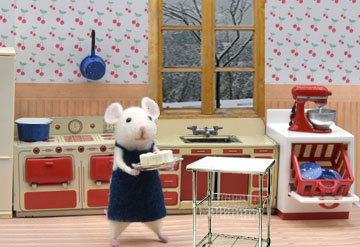
The Mice Step Out!—Storytelling
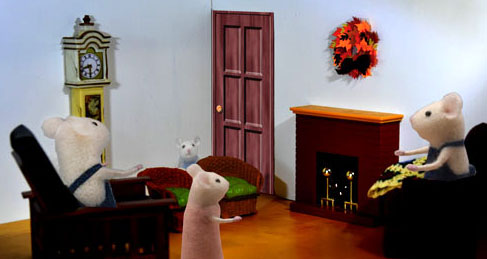
Mice love storytelling. On stormy November evenings, they gather around the fireplace and tell stories. Sometimes, those are old stories of mice long ago. And sometimes they make up stories for each other, like this one:
"There was once a little mouse who read a book about all the animals that fly," LadyMouse began.
"How little was that mouse?" ToddlerMouse asked.
"I think he was older than you," said his mother. "But maybe not that much bigger."
"Someday I will be big," said ToddlerMouse.
"That's true."
"What did he do?" ToddlerMouse asked. "The mouse who read the book."
"That is the story," LadyMouse said. The mice children sat very still so they could listen to the story.
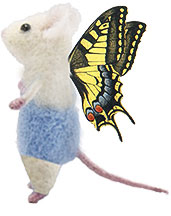
Little Mouse read about bees. And about hummingbirds. And other birds, too. And bats. But the ones he liked the most were butterflies, because they had such pretty wings.
Little Mouse wished he could fly. He wished he had pretty wings like a butterfly. But he did not.
"Why can't mice fly like butterflies?" Little Mouse asked.
"Butterflies don't have nice tails like we do," said Little Mouse's sister.
Little Mouse agreed. Tails were fine things. But he didn't see why he couldn't have wings, too. After all, they were in a different place. Why couldn't he have both?
But no one knew.
"Time to buy some new clothes for Little Mouse," said his father. "Those trousers are much too short."
So he took Little Mouse shopping. They tried on clothes. Little Mouse thought the blue trousers and the red ones were nice enough. But nothing in the clothing store looked like the wings of butterflies.
They went home with red trousers and blue trousers, and Little Mouse went back to his book.
The more he studied the pretty pictures, the more he wanted wings.
"I'll just try some on," he said. "Like those red trousers and blue trousers."
So he took his book to his mother's big mirror and stood in front of it, looking first at his reflection, and then at the beautiful butterflies. And before long, he could almost see the two things come together. He could picture how he'd look if he had beautiful wings.
Little Mouse was excited. He jumped up and down and squeaked. But then he thought, that even though he could picture himself with the beautiful wings, he still could not fly.
First he was sad. Then he thought, "If I could try on the red trousers and the blue trousers, if I could try on the wings, maybe I can try on flying."
What would it be like to fly? "Everything would be lower," he thought. "Like when I ride on Daddy's shoulders."
So he thought of everything being lower. His house—he would see only the roof, which was green, so he put that in his picture. And the trees—they would be green blobs, but it wasn't the same green. And the street in front of his house, and that was gray.
He pictured something like a map, like Daddy's map that he frowned at when they went somewhere in the car. Only, Little Mouse's map was all colors, and it had everything Little Mouse knew in it. All the mice in his neighborhood and their houses and gardens, and everything he'd see if he could fly.
He swooped, like he'd seen birds swoop, and hovered the way bees did. And fluttered with his butterfly wings, and did everything he wanted to do.
And when he came down again, right there in front of his mother's big mirror, he saw a huge smile on his face. And he ran and told his mother all about it.
"That sounds wonderful," his mother said. "Your imagination makes you fly, Little Mouse."
"Even when I get big?" Little Mouse asked.
"Always," said his mother.

Recommended Reading . . . and Not
Recommended
Consumer Reports Kitchen Planning and Buying Guide. Great for reviews of products. Probably oriented more toward homeowners—more toward rehabilitation, including some construction—than toward making the best of what you have. Recommended if that level of advice is what you need.
Consumer Reports Magazine. Offers the same sort of help as the special guide. The best product evaluations you can get, because they don't accept advertising.
Home Comforts, by Cheryl Mendelson. Excellent suggestions for kitchens and many other topics.
Kitchen Organization Tips and Secrets, by Deniece Schofield. Good ideas for cooking as well as kitchen storage.
Kitchen Hacks, by Cook's Illustrated. Good suggestions for easier and more effective food preparation.
Kitchen Appliances 101, by Donald E. Slivers. Good discussion of appliances.
Food Safety at Home, by Jennie Webb. Good overview of a very important subject.
The Itty Bitty Kitchen Handbook, by Justin Spring. Good ideas for organizing small kitchens.
Store This, Not That!, by Crystal Geoffrey and Debbie Kent. Practical discussion of food and food storage.
Not Recommended
The Sidetracked Sisters Catch Up on the Kitchen, by Pam Yound and Peggy Jones. I didn't find this book useful.
Recommended Products . . . and Not
I have no financial interest in any of these companies, and have not received anything in exchange for my recommendations.
Recommended
Nielsen-Massey Tahitian Pure Vanilla.
Boyajian Pure Lemon Oil.
Brod & Taylor Professional Knife Sharpener.
Spectrum Diversified 40500 Magnetic Paper Towel Holder.
Camco 43583 Knife Safe.
Not Recommended
HOPE'S Premium Home Care, Wax Free Counter Top Polish. Does nothing, in my experience. Don't waste your money.
Any glass cooktop. It's not just me—everyone I know who has tried one of these things, hates them. They distribute heat even worse than regular electric burners, if that's possible, and they scratch easily. They also require special cleaners, and it can be very difficult to remove spills.
Credits
Felted mice by Diyana Stankova.